Just wanted to do a quick update on our recent progress with the house. You might have thought, “Those guys must be finished everything by now”, but you’d be wrong. We have only a couple things left to do to get our final occupancy certificate, and one of them that is just taking forever to get done is the siding.
I finally completed the third (of four) walls, and have started on the last wall in hopes of getting it done before it is too cold to work outside.
Gable end siding (West side)
Of course there is still the battens and trim around the window to be installed, and then staining the siding after that, but we are getting there (baby steps!)
I also managed to get our radiant heat system connected, and it works really well. I still have to figure out some kind of thermostat system, it is very much manual, but we are exceptionally cozy in here so far as the temperatures are dropping off.
Hopefully I will be able to post again soon showing the final wall of siding completed, that will mean we will be just about ready to get our final occupancy!
Hey all – just a quick picture of the current progress. We finished off all the siding around the porch and have our scaffolding up to tackle the siding on the west end. We’ve also begun priming and painting all the trim to go around the windows and doors.
Porch pretty well done
We still have not had to run our generator since the last post, it’s been since May 3rd that we’ve been living off the power of the sun – awesome!
Just a quick update on how the solar system is working out. Everything has been going great, and it’s getting even better now that the days are getting longer. We recently hit a record of going nearly a full month without having to run the generator at all!
April 2016 Solar / Generator Report
Even on partly cloudy days we generally collect enough solar power to fully recharge our batteries, which is ideal. Hopefully we will be able to break our record as spring turns to summer!
Well, we are still alive and, yes, still trying to get everything done on the house to get our full occupancy permit. The push to get our partial occupancy was pretty draining, and so I ended up slacking and taking most of the winter off. Now that spring is here it’s time to get back at it!
One of the things I got squared away was to build a small retaining wall out of some 6×6″, 12′ long pressure treated beams. We desperately needed to get that in place, as we have no gutters, so every time it rained it would wash away more of the sand backfill from the back side of the house. I still have to add a couple of more beams to the top, to finish it off to where it needs to be, but it’s already made a huge difference.
Small retaining wall to prevent erosion.
We will need to get in a bunch of topsoil and backfill the area, then seed it out with grass to finish it off completely.
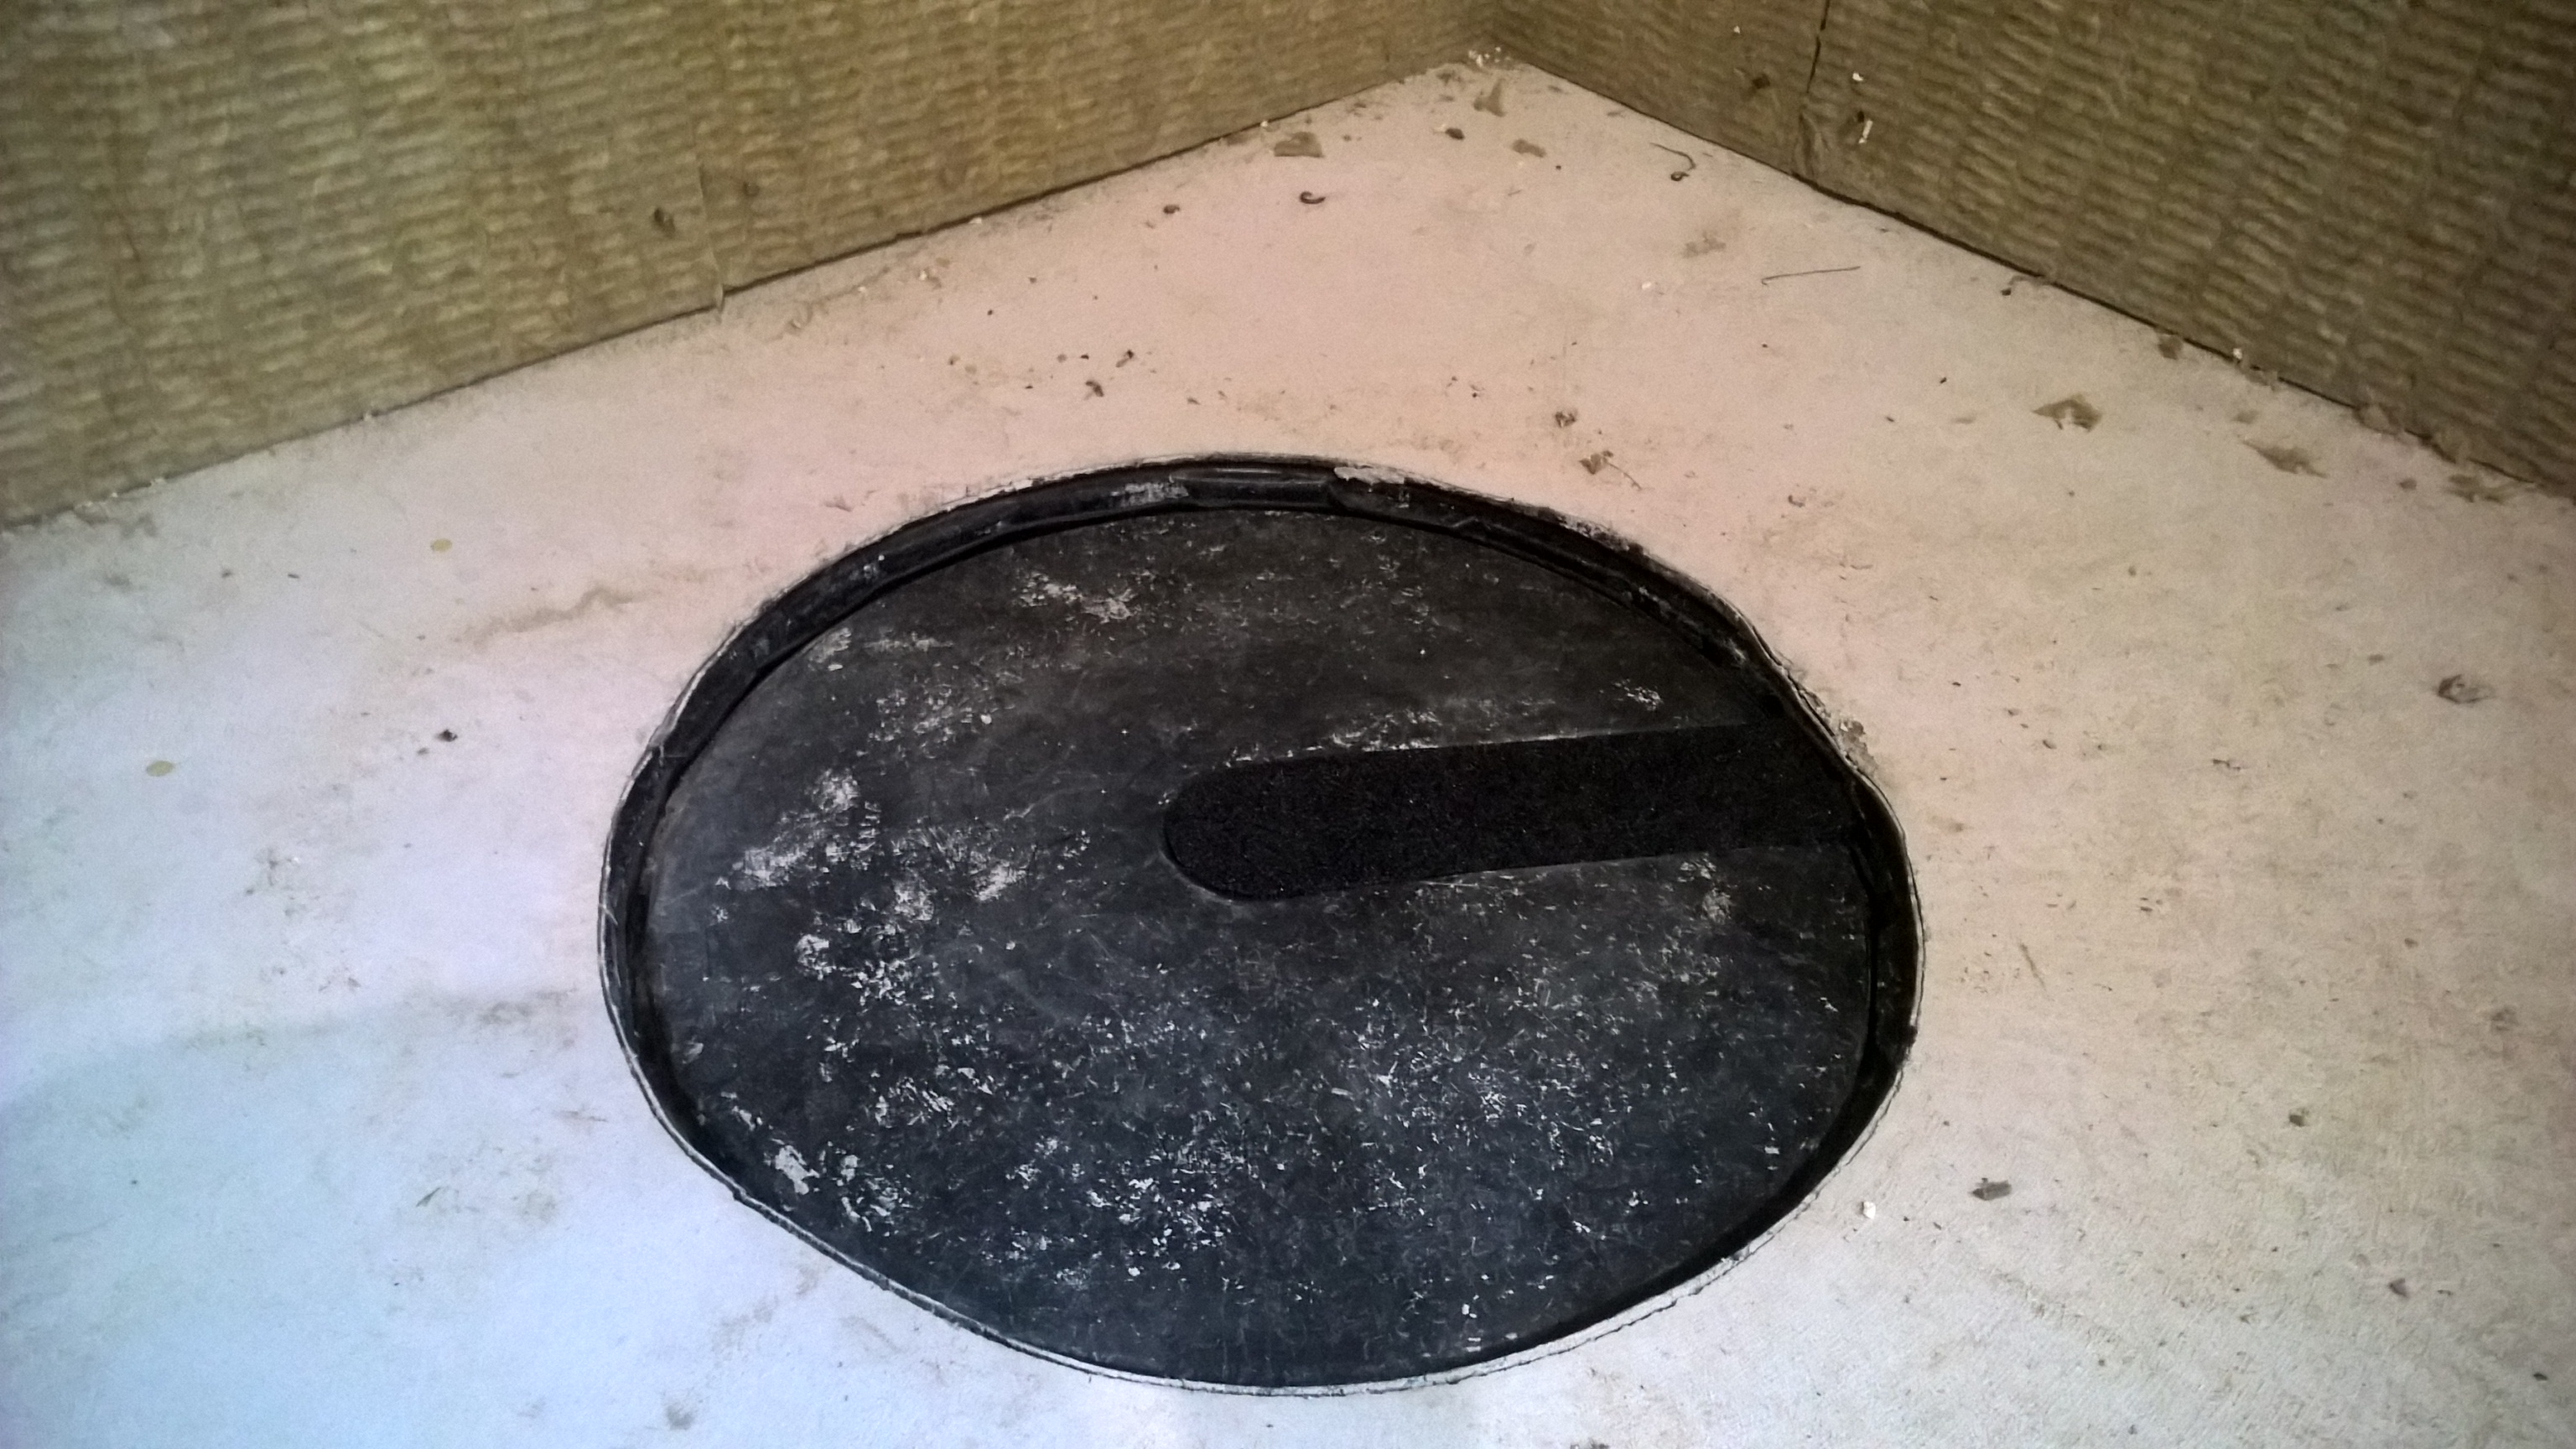
One of the other, easy things, to cross off our list was to seal our sump pump pit. It’s just a simple kit with a sealing gasket and a foam insert to seal the opening in the lid. As we have had no problems with flooding since we’ve been here, we have opted to pass on installing a sump pump for now.
Sump pit – sealed!
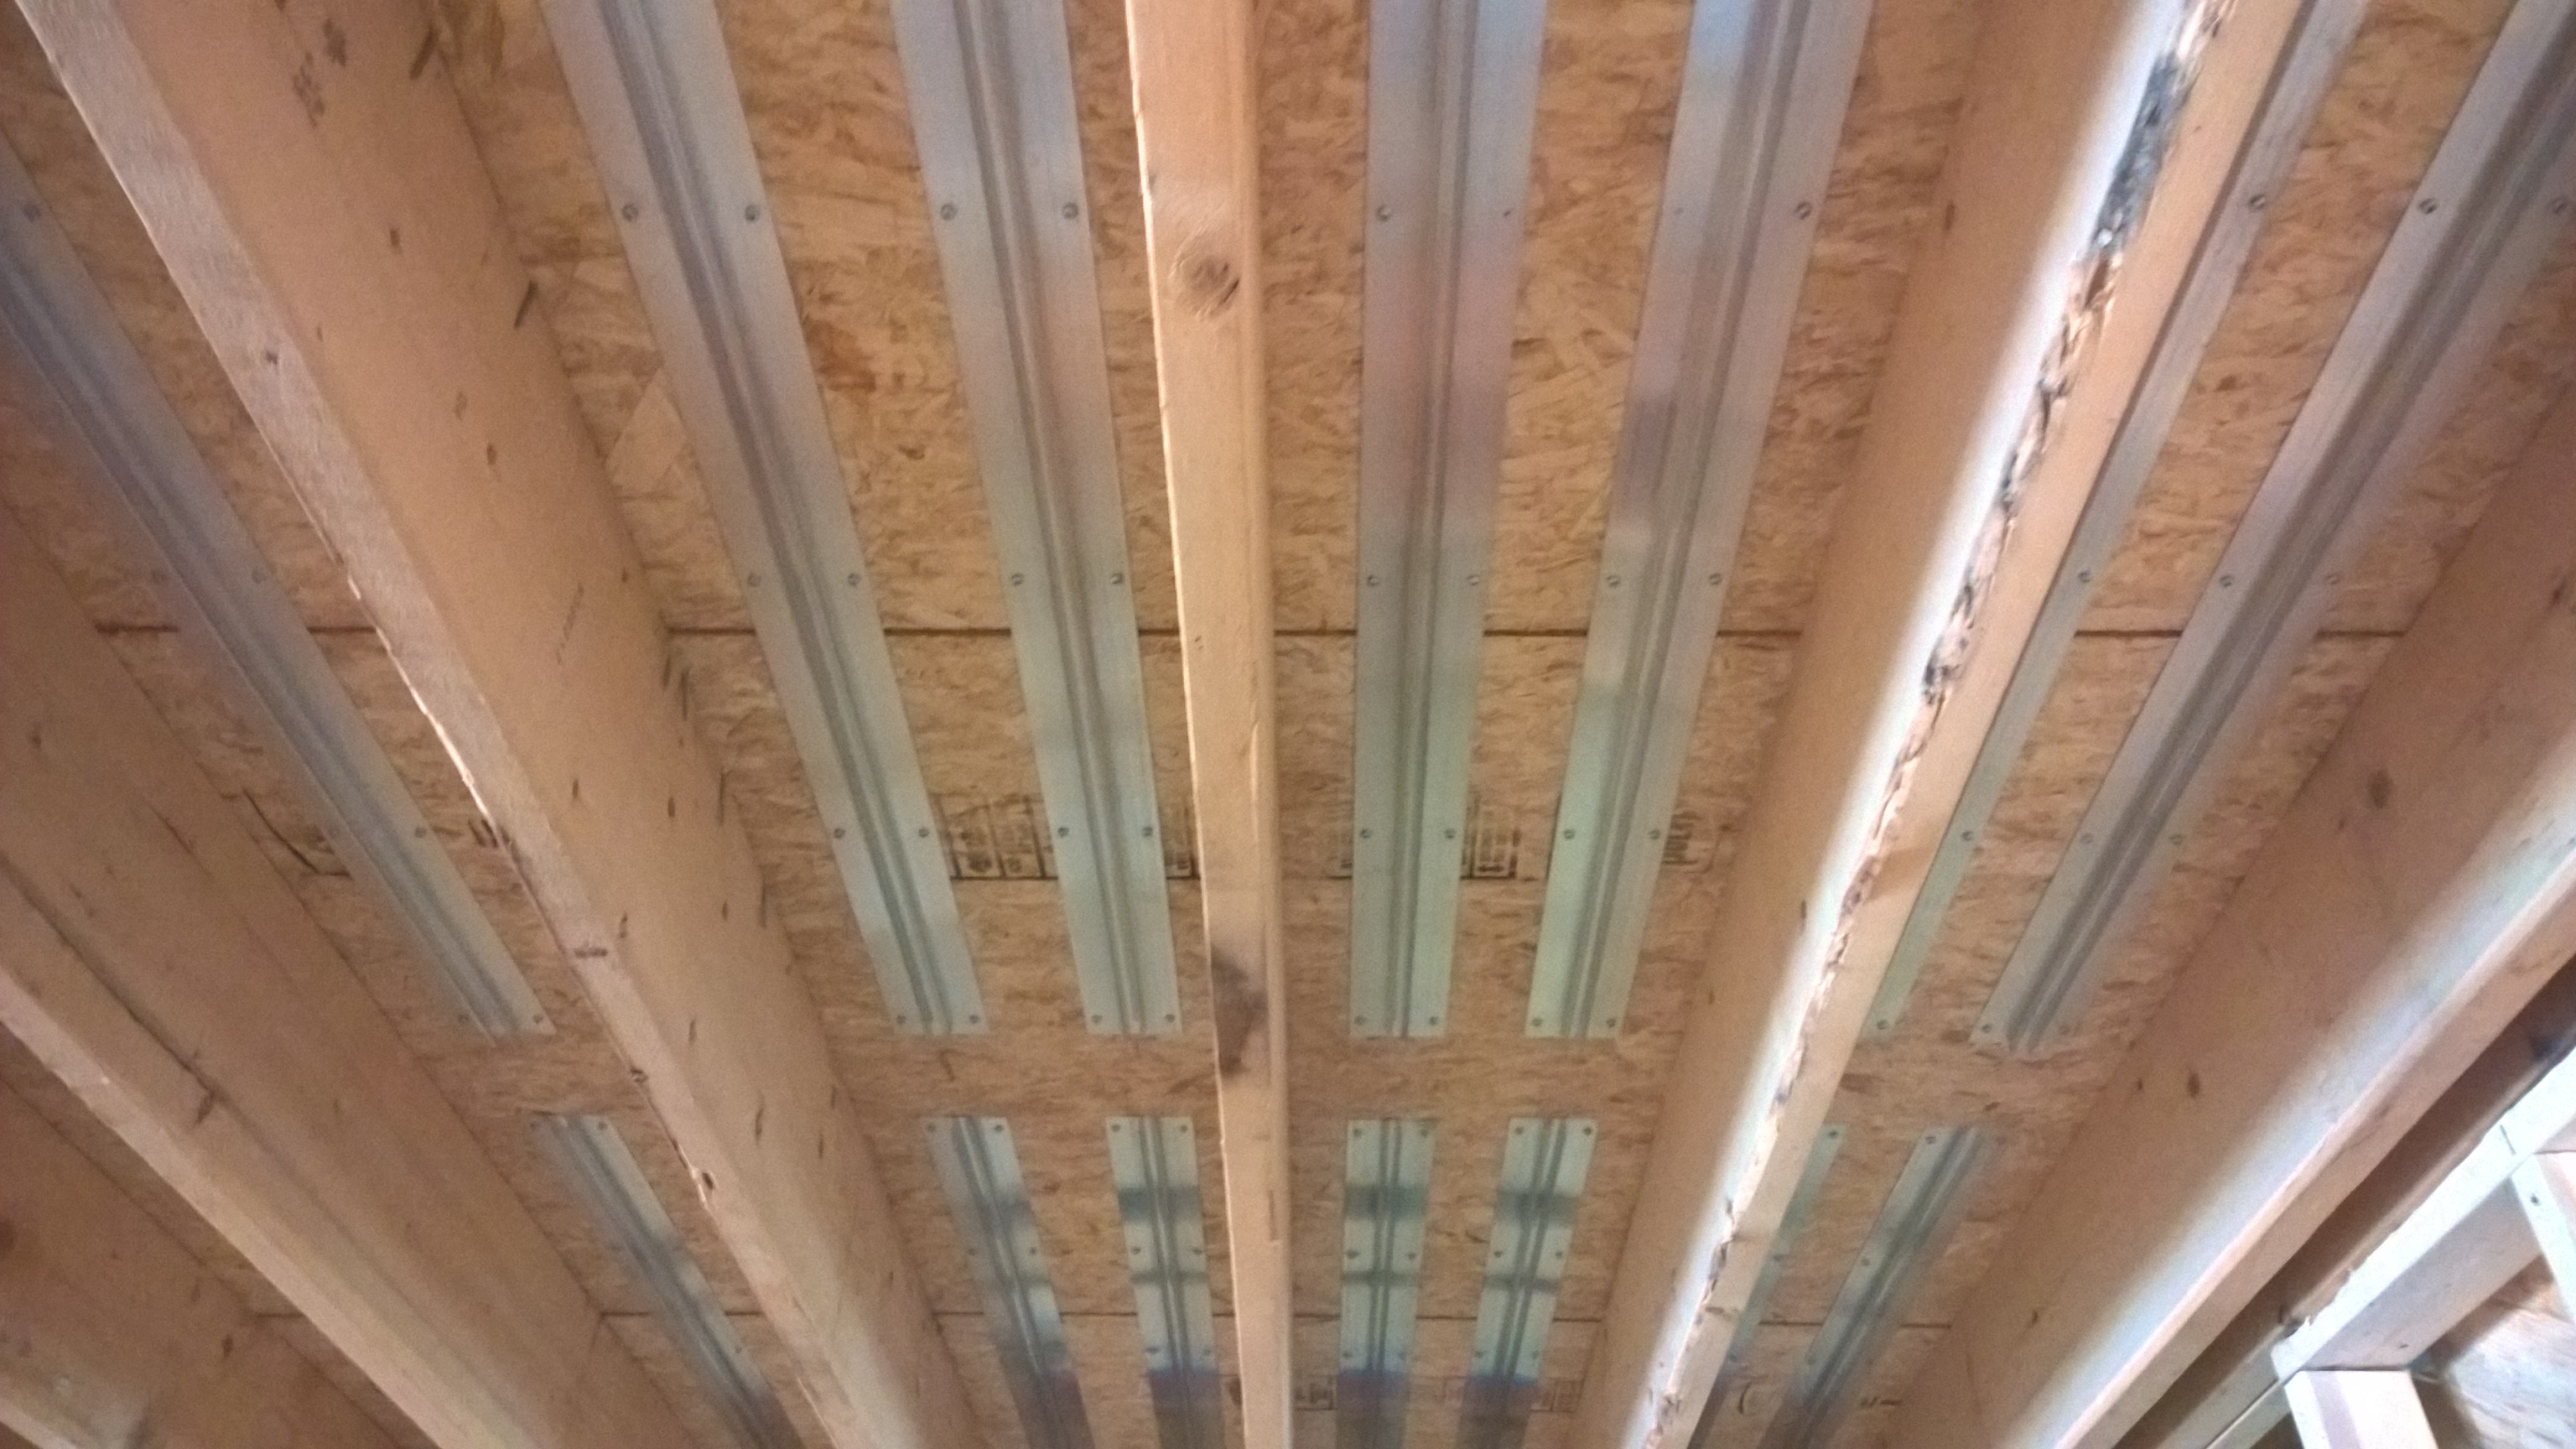
One of the other things I got around to starting (lots of starting – it sometimes seems not as much finishing!) was installing the aluminium radiant heat panels to the ceiling of the basement, to provide a warm floor upstairs in the house.
Joist Trak radiant heat panels
These are real solid panels and are nice in that you install them first, then you can just snap the pex tubing into them – the other kind you can get, you have to install with the pex tubing and are a bit of a bother from what I’ve gathered. I’ve found them pretty easy to install but it takes some time as there are 10 screws per panel. I got lucky as the spacing for them is quickly and accurately measured with a spare piece of 2 1/4″ hardwood flooring, which is handy for having them all consistently installed from joist bay to joist bay. Still have a couple hundred more of these to install down there but it is coming along.
Hope you’ve enjoyed the update after this long period of silence! There’ll be more updates coming soon, as I’ve gotten a few other things done – but I’ll end it here for now.
Since my last post I was able to get the second half on the solar array connected, and the power has been coming in steadily with the sun beaming down over the last few days. We are really pleased by the amount of power we are generating, and we should have more than enough to meet our needs through the shortest days of the year. Next summer we will no doubt have an excess of power – a good position to be in when you are off-grid!
Over the weekend I popped over to Quebec to help a friend out installing some IKEA cabinets. They had purchased a couple of the PAX wardrobes, a bathroom vanity (with double sinks), and two medicine cabinets for above the bathroom vanity. It was a long day on Saturday but I was finally able to get everything wrapped up for them this morning before I left.
Bathroom vanity and medicine cabinets
PAX wardrobe (closed)
PAX wardrobe (open left)
PAX wardrobe (open right)
We’ll be sure to post more soon as we make further progress! Hope you enjoyed the pictures, even if they aren’t from our house 🙂
Yesterday I managed to get enough done on the wiring of the solar arrays such that I was able to temporarily connect half of the panels. I still need to lay the conduit and pull the wire through it, but before pulling the wire through the conduit I figured it would be a good idea to give everything a functional test just to make sure it’s all working as expected.
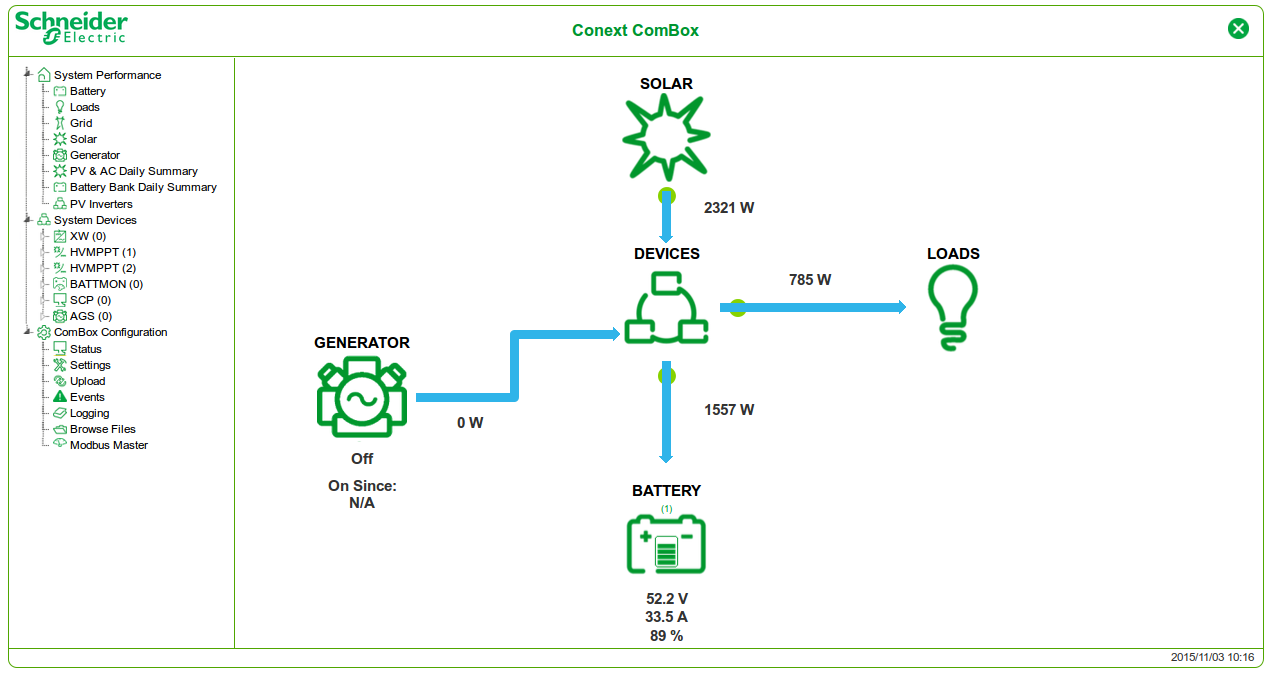
Here’s a screenshot of the system status screen:
Solar Charging
Around 2,300W, and that is only half of the array! When we get the other half fired up, we should have more than enough power.
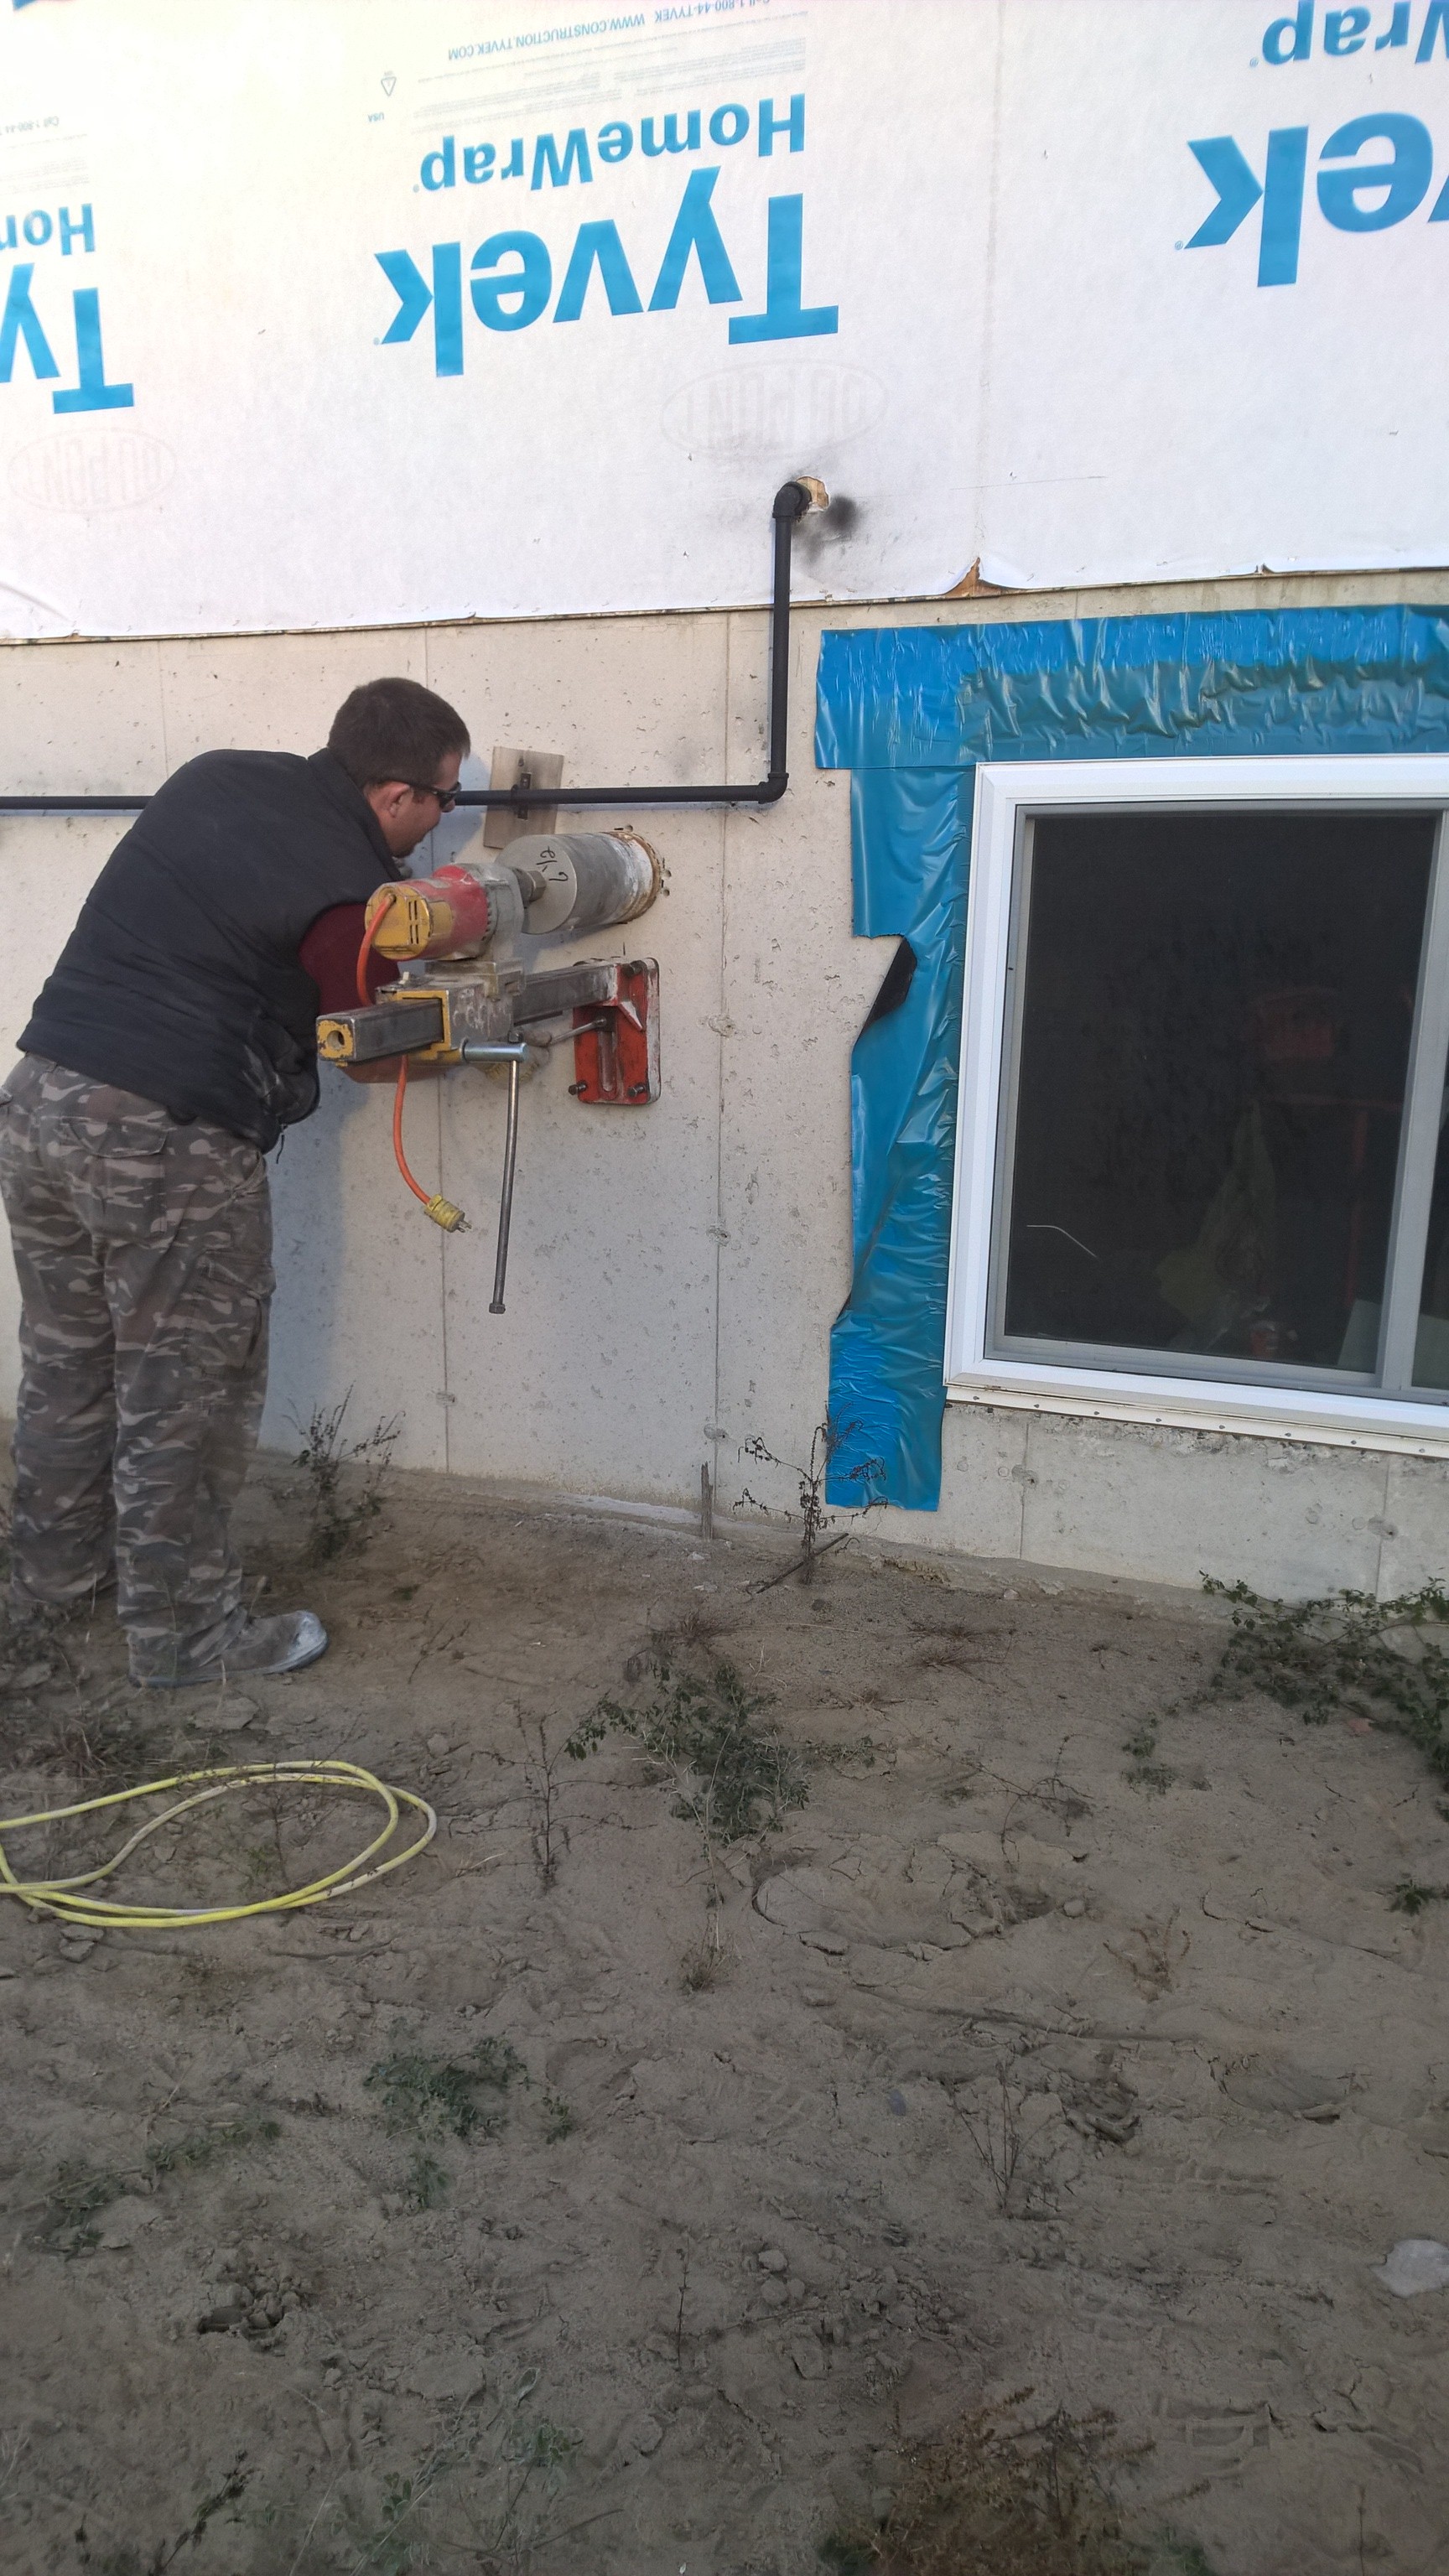
Today was a pretty full day – this morning at the crack of dawn we had a concrete cutting contractor show up to help us out drilling two 6 1/2″ holes in the foundation for the HRV fresh air intake and stale air exhaust.
When dad was here visiting and helping out, we figured we would try to make these holes using a 1/2″ masonry bit to drill a series of holes in a circle through the basement wall, the idea being once we had enough holes drilled around the circle we could hit it with a sledgehammer and knock out the centre. The problem is, the basement walls are hard…ridiculously hard! We drilled three or four holes before we gave up on that idea, without having made much headway at all.
Some jobs are best left to the professionals with the right tools! The contractor was in and out of here in about an hour and most of that was just setting up to drill, and packing up.
He starts out by drilling a small hole in the foundation to attach the “arm” of his drill press.
Step 1: Attach drilling support
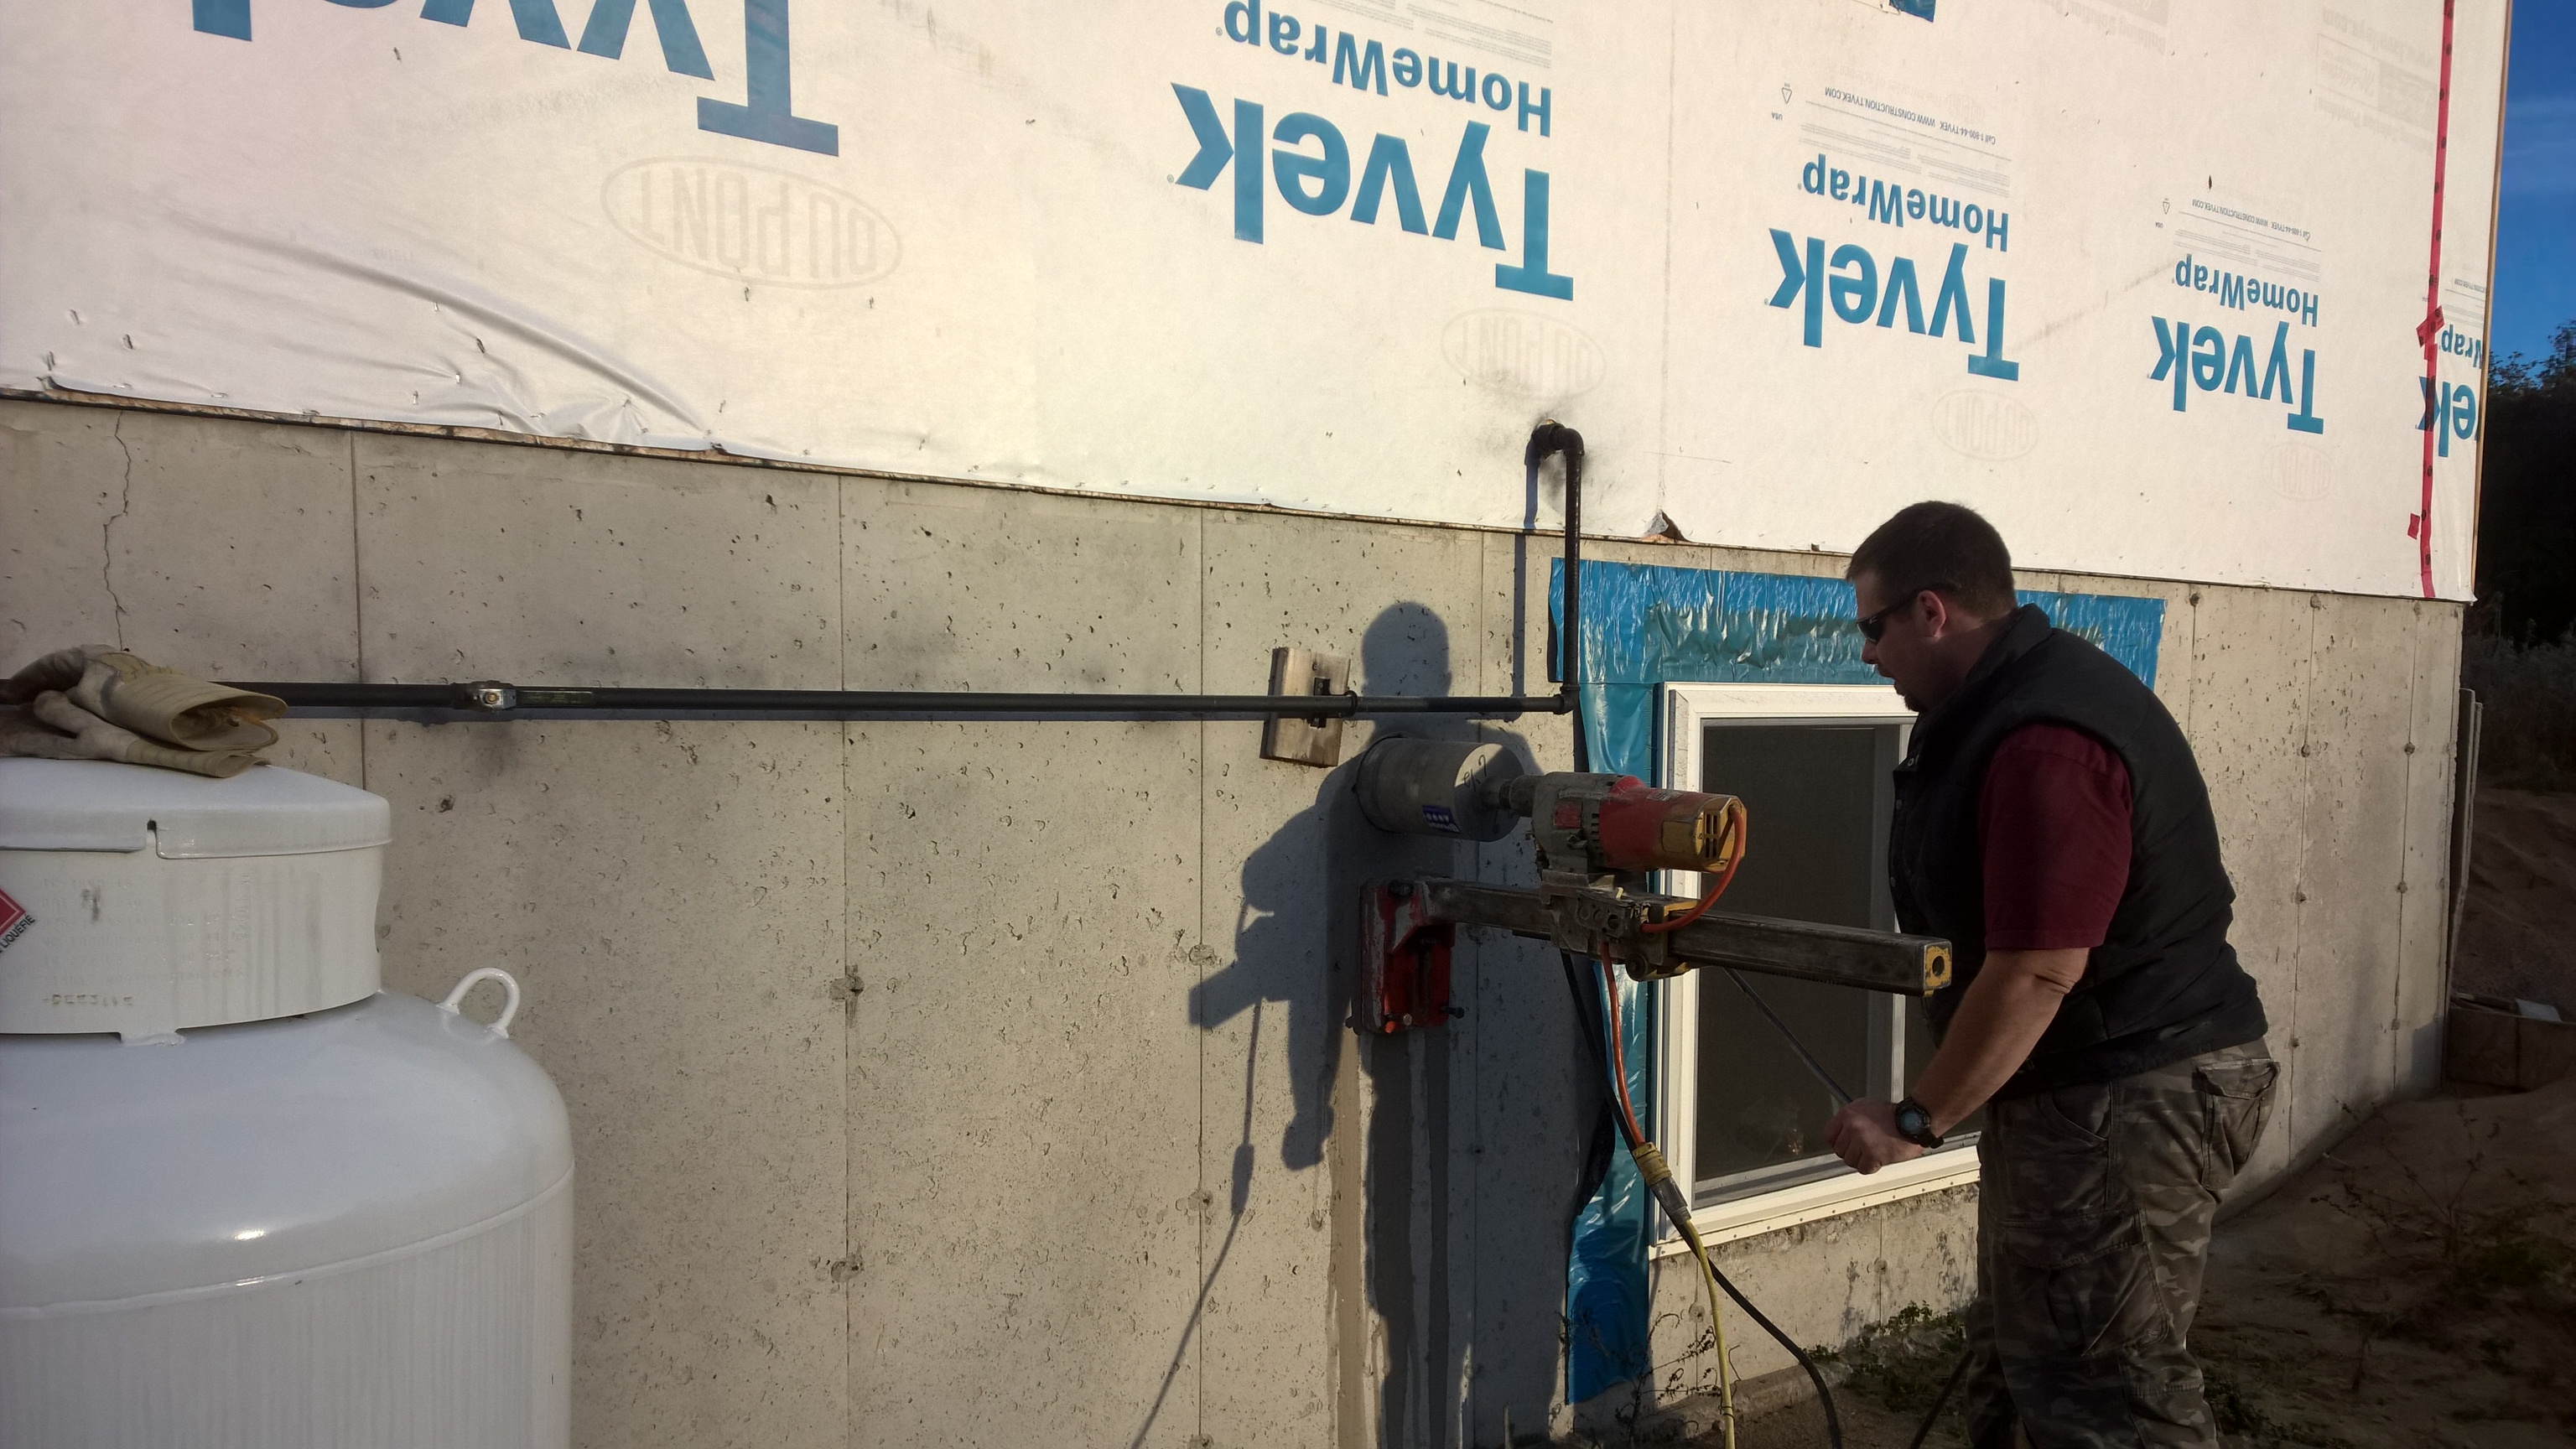
Next he puts the 6 1/2″ diamond core drilling bit on his rather industrial strength looking drill and sets everything into place.
Step 2: Lock drill into position for drilling
If you look closely at the above picture you can see a few of the 1/2″ holes dad and I drilled 🙂 Once the drill is positioned and the support arm is secured, all that’s left is to turn on his portable water supply (to keep the core bit cool while drilling) and start drilling.
Step 3: Drilling!
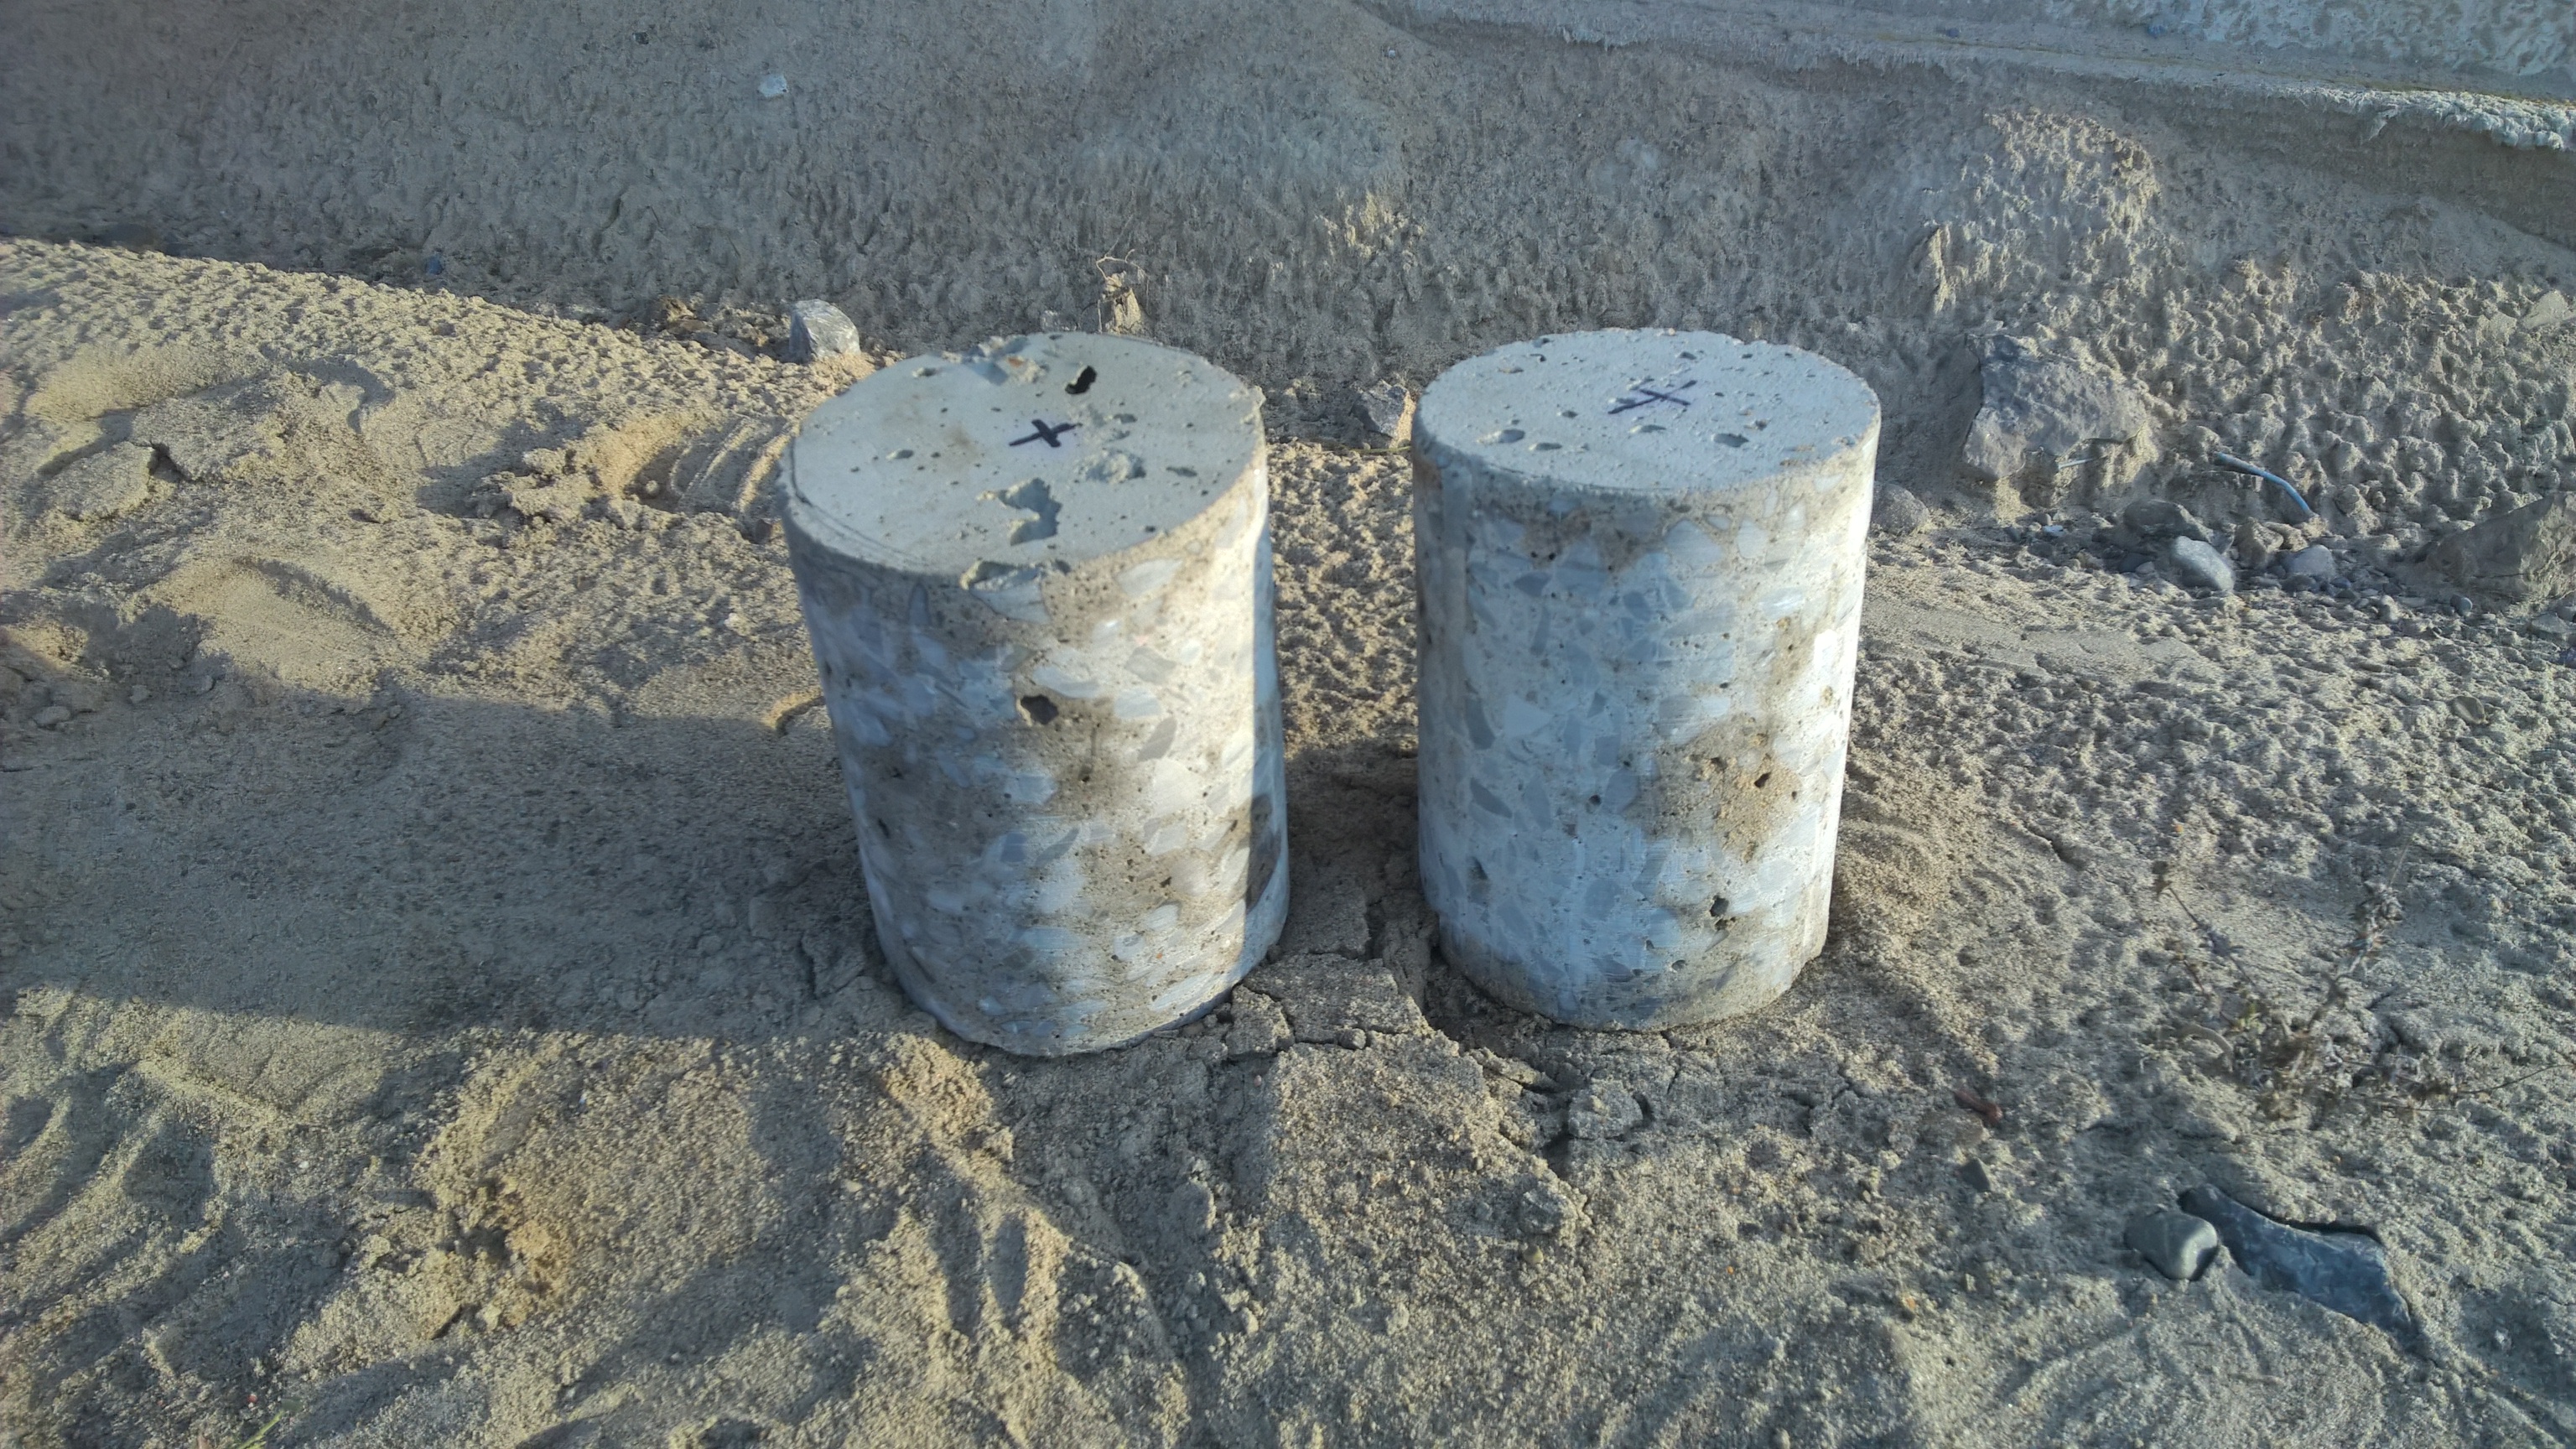
At the end of the process we were left with two concrete cylinders which I expect we will put in the garden or some such as decorative stones.
Concrete cylinders
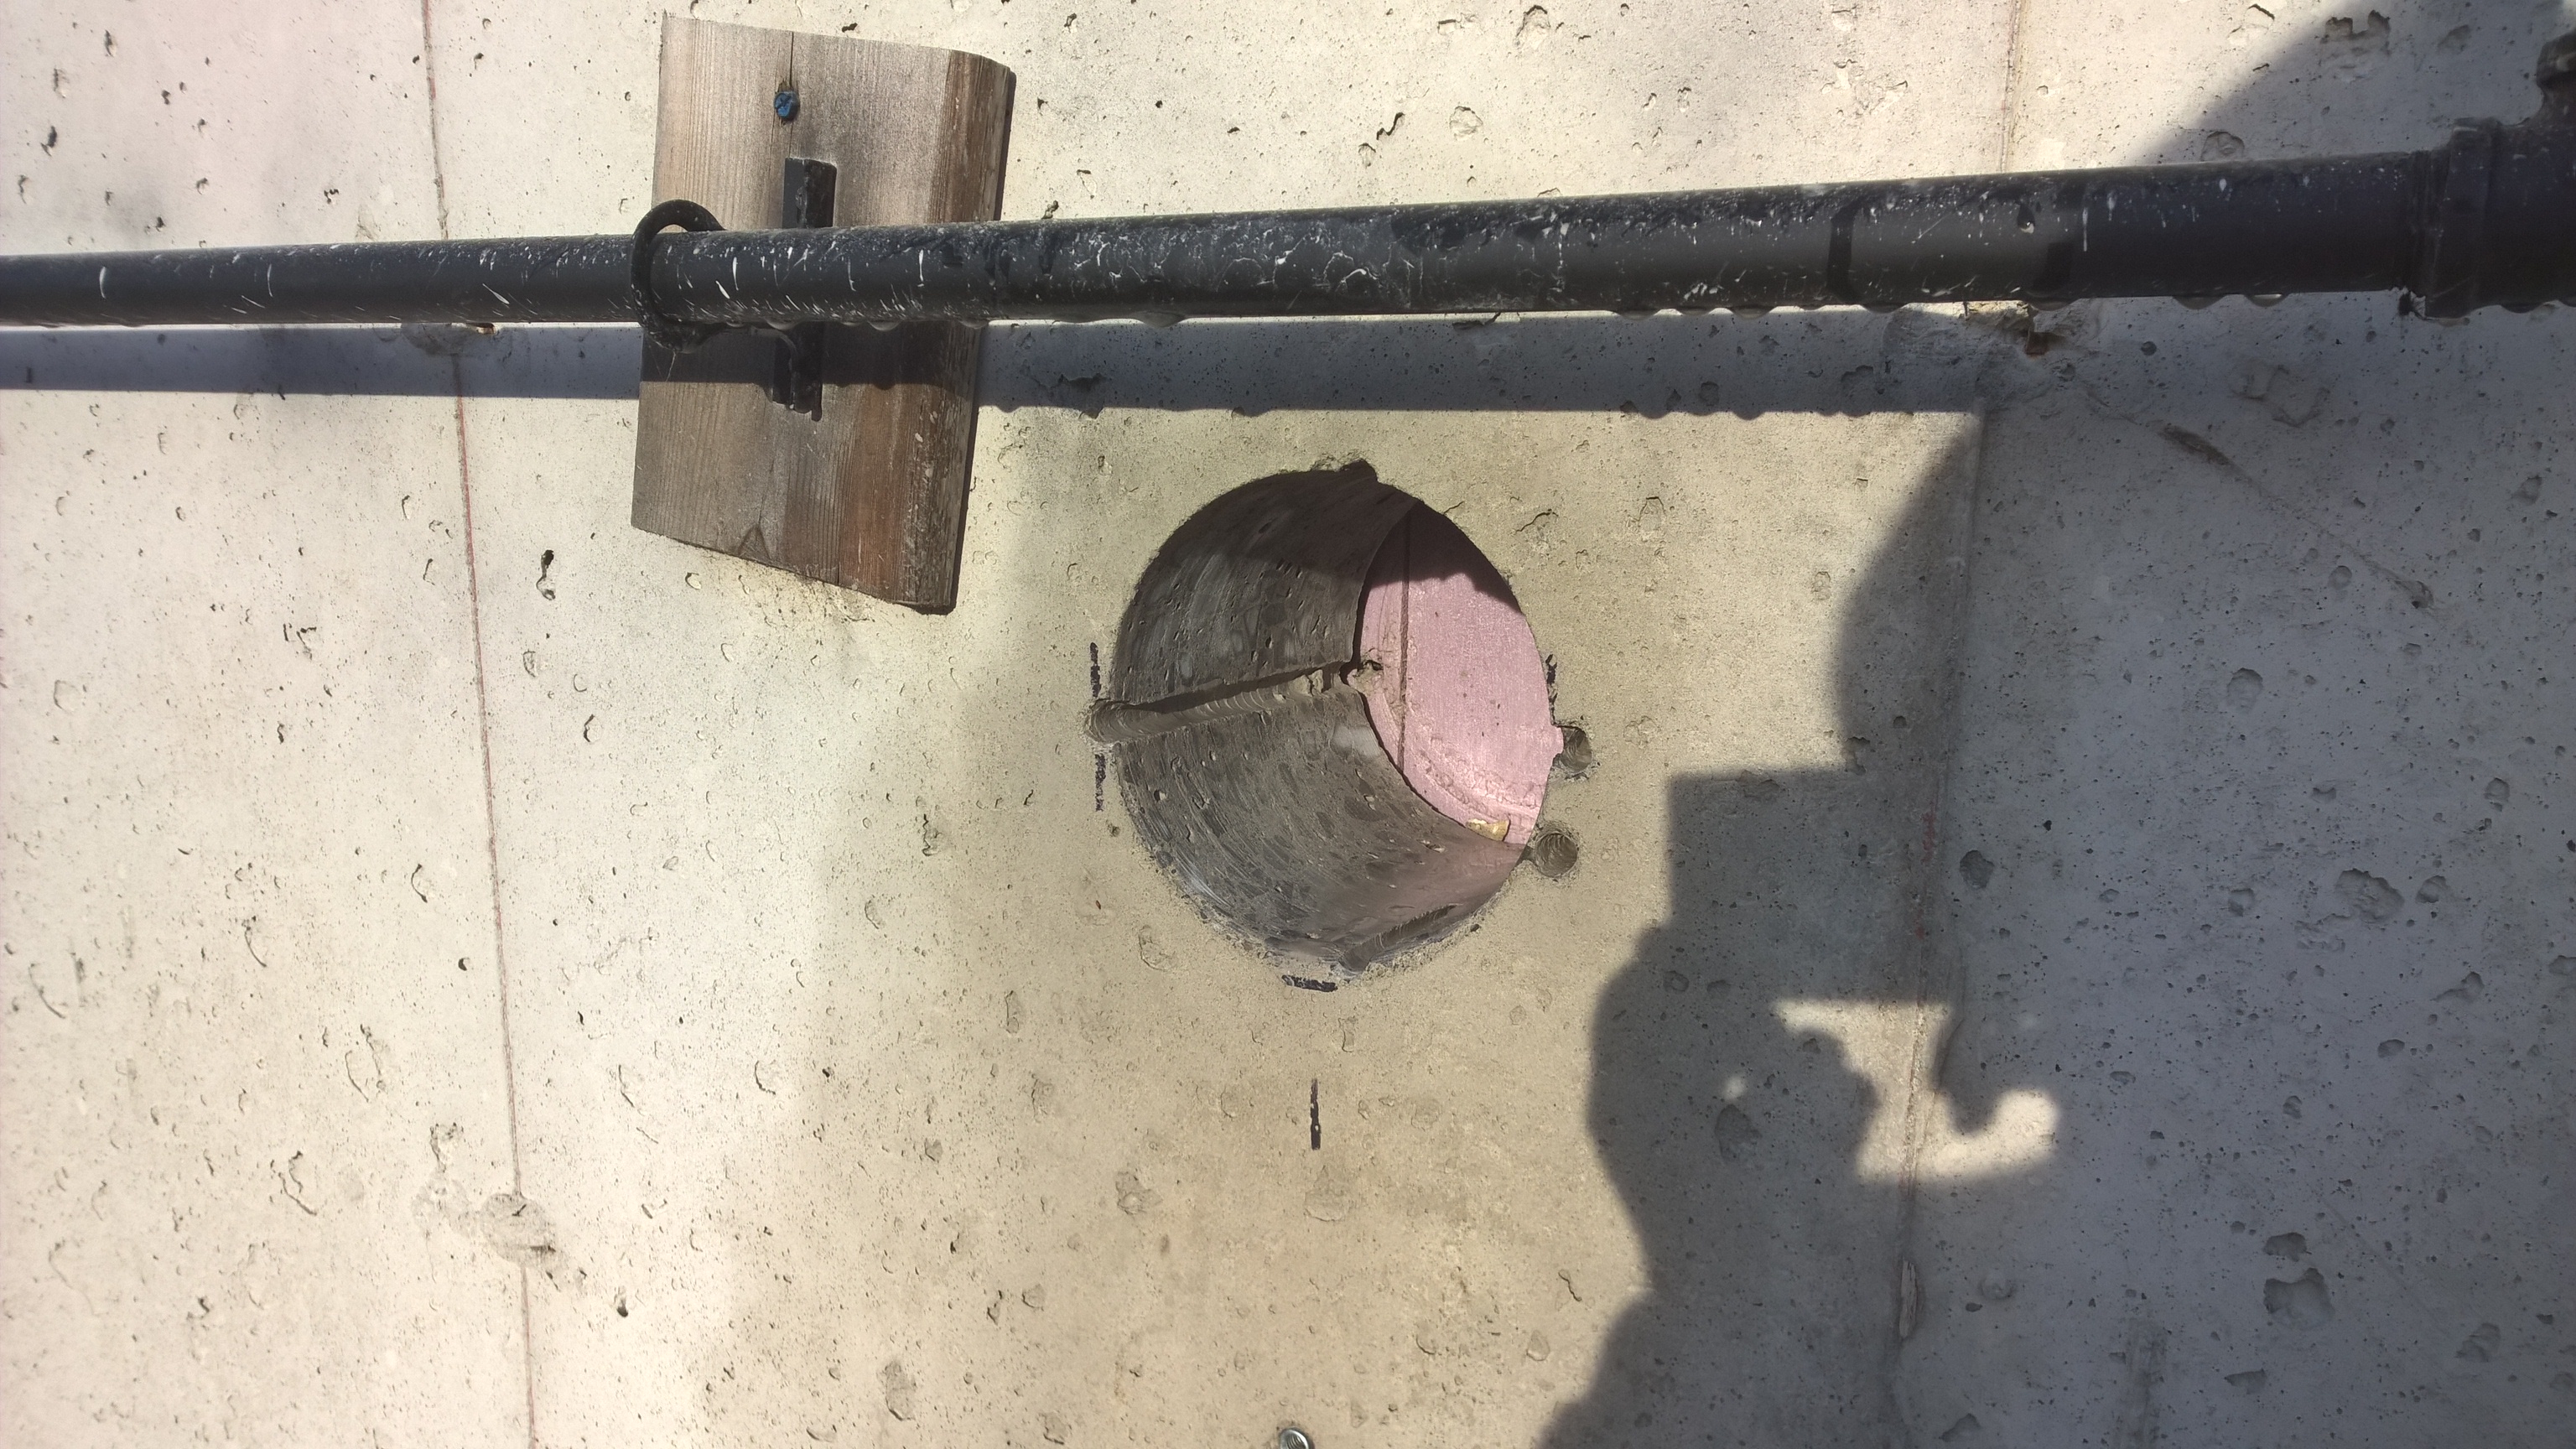
And, of course, two perfectly drilled 6 1/2″ holes through the basement wall.
Nicely drilled hole!
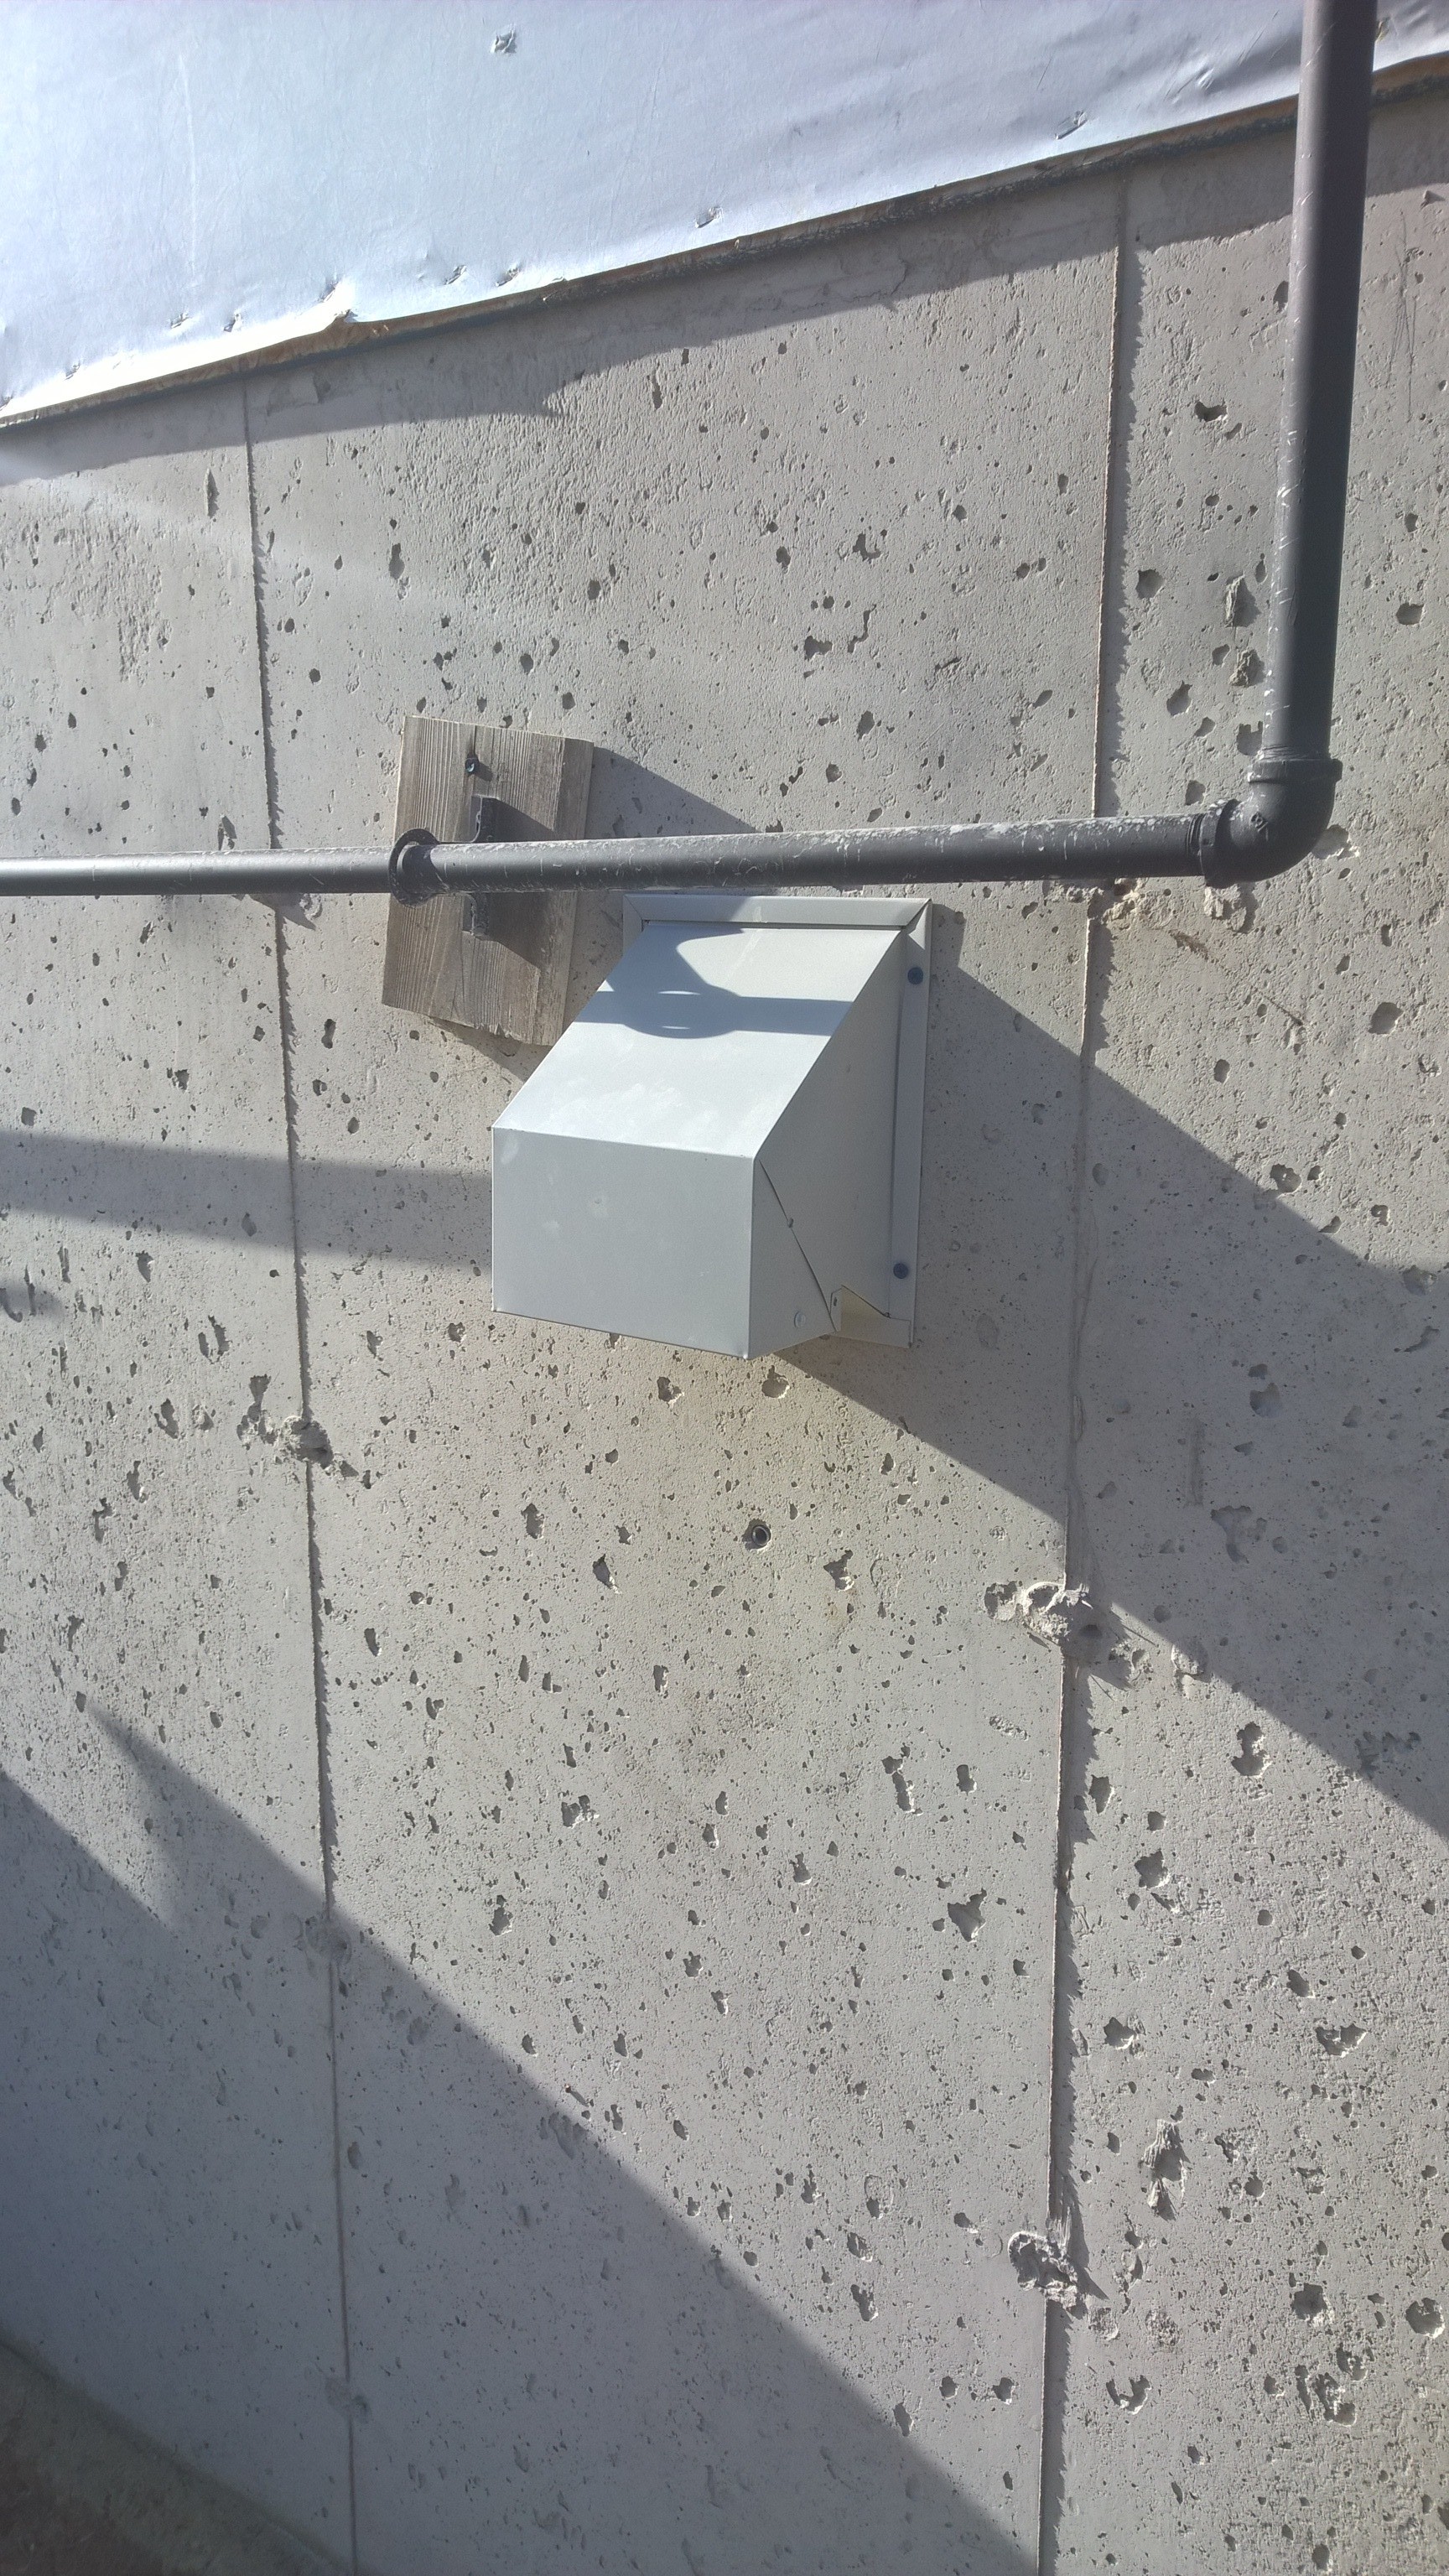
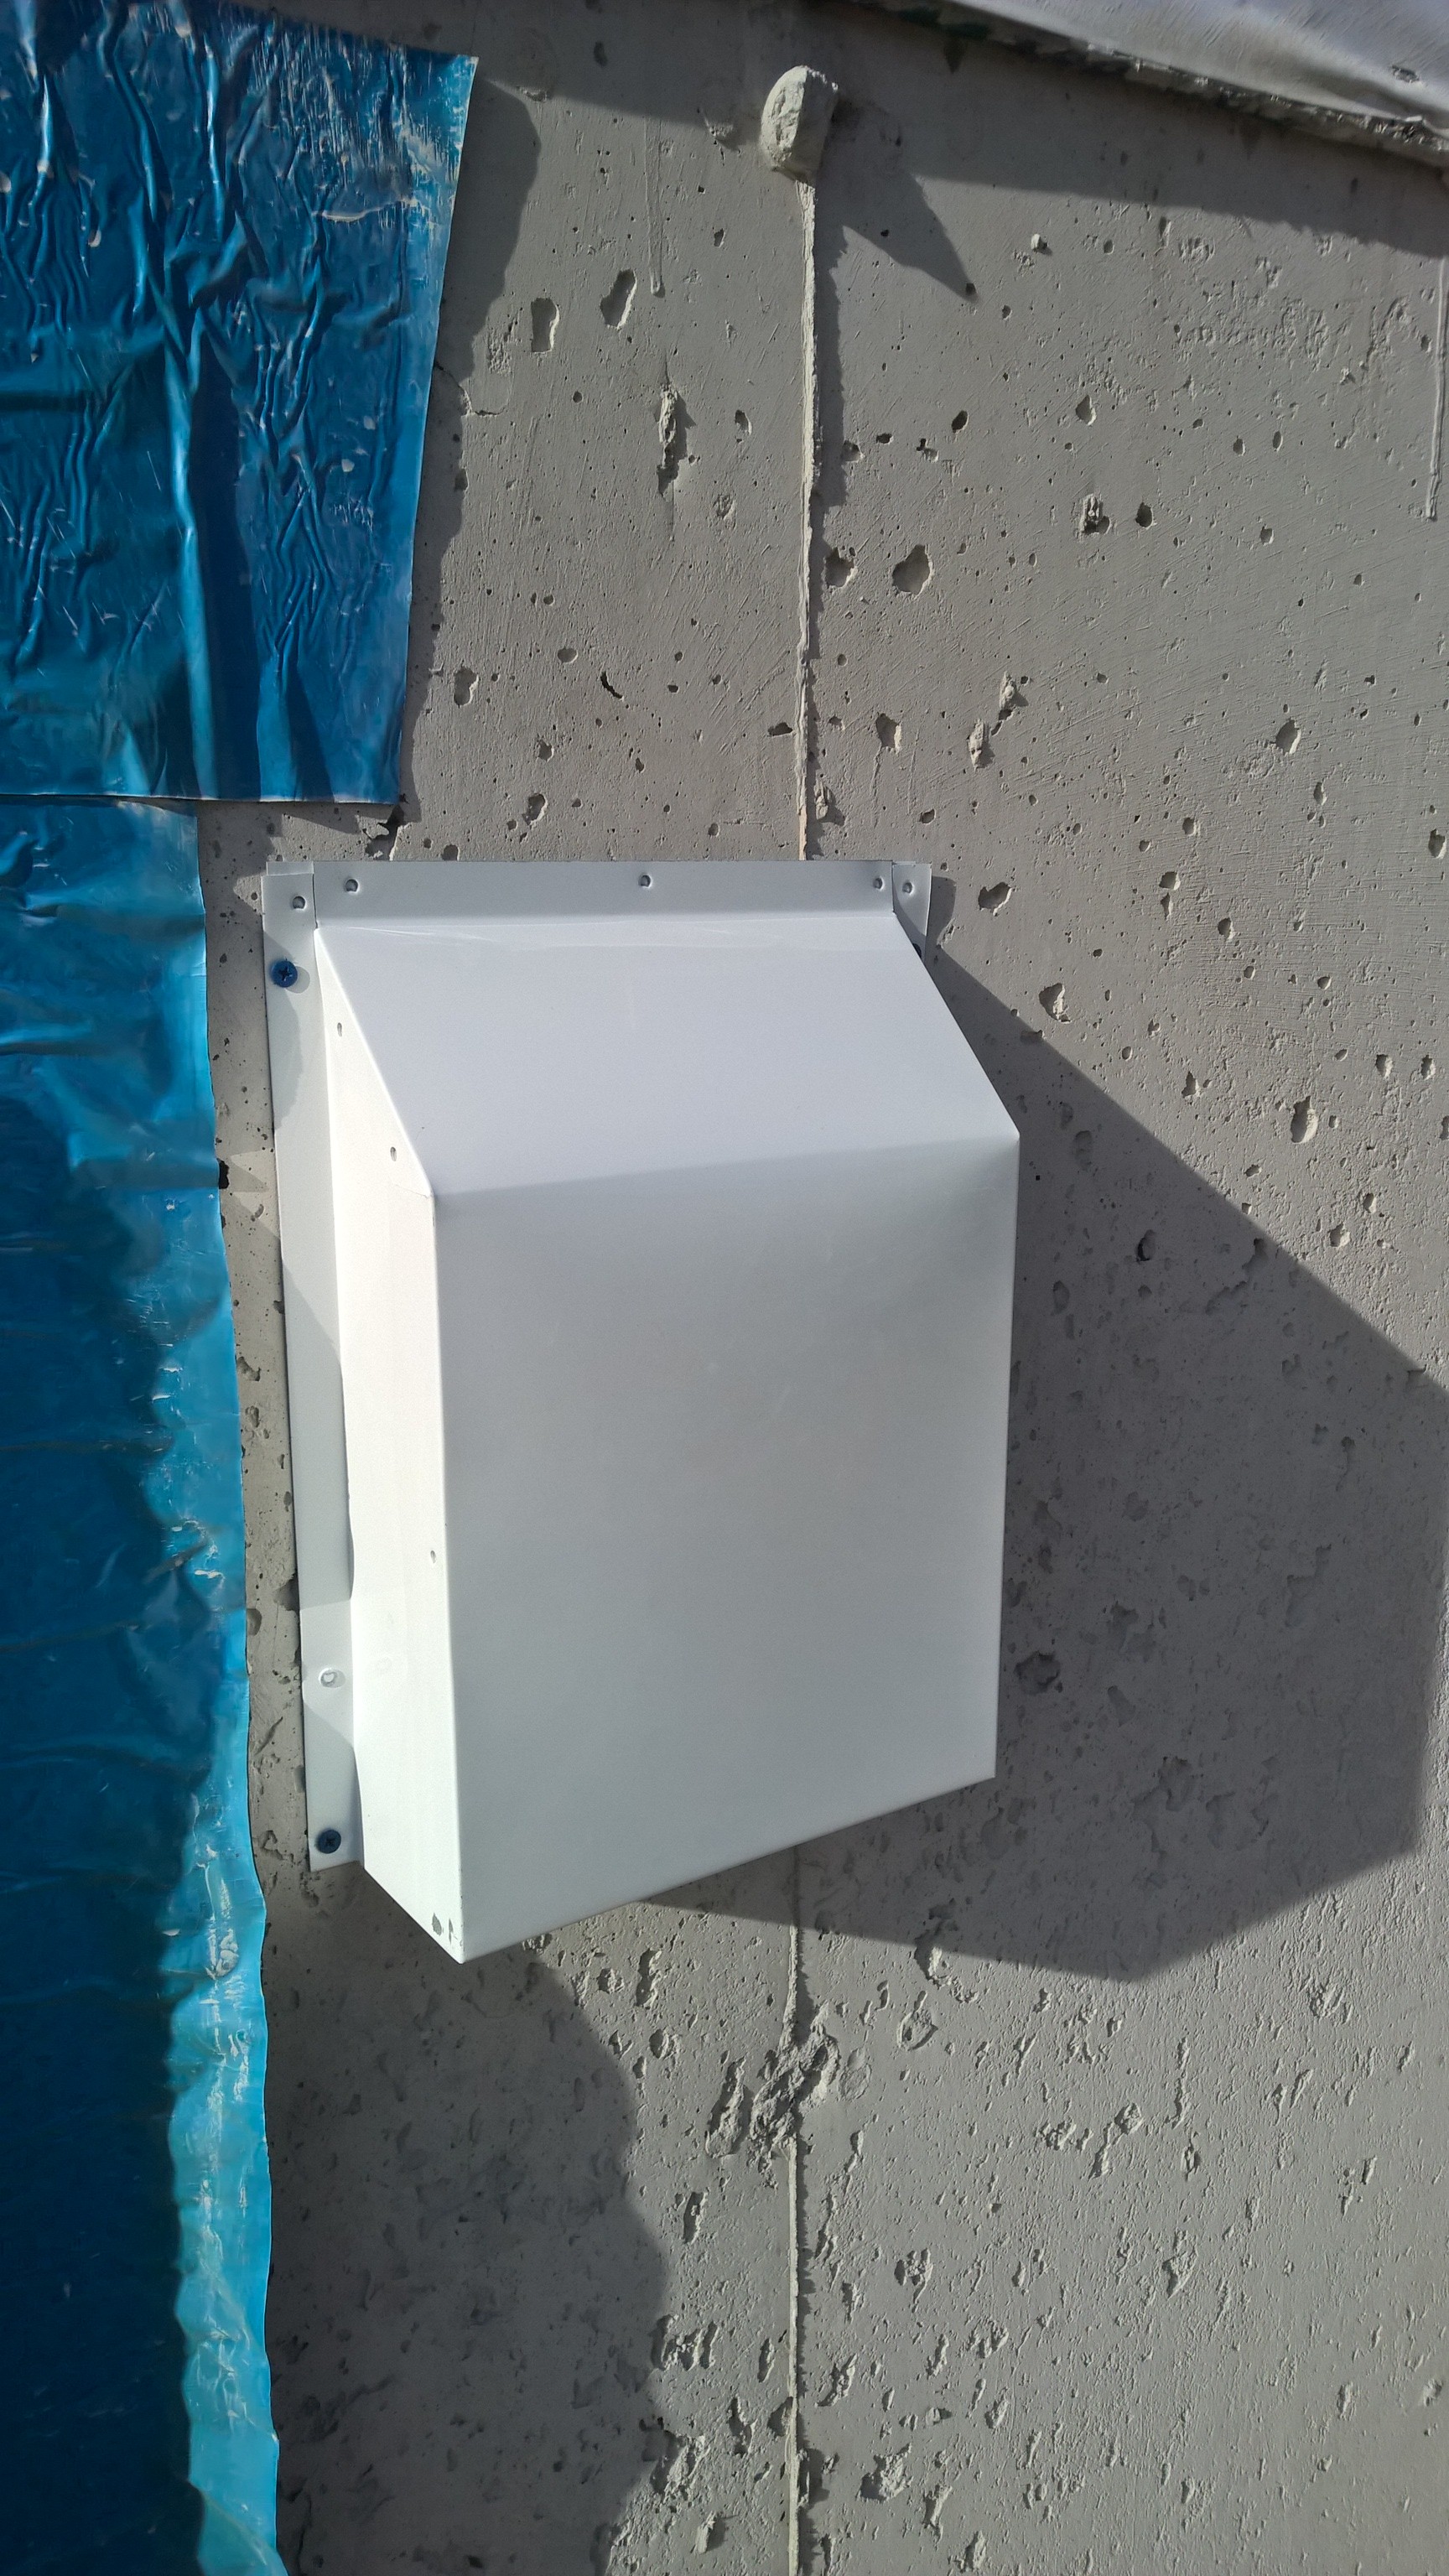
From there, all that was left to complete the final HRV connections was to attach the exterior hood for the stale air exhaust, and the fresh air intake grille. The fresh air intake grille I covered with an “anti-gust intake hood” which is recommended if you live in an area that gets sub-zero temperatures in winter.
R2000 stale air exhaust hoodFresh air intake under anti-gust hood
On top of that, I also got a bunch of wiring and parts needed to continue work on connecting the solar panels, so I will be continuing on more with that in the coming days! Hope you enjoyed the pictures and we’ll post again soon!
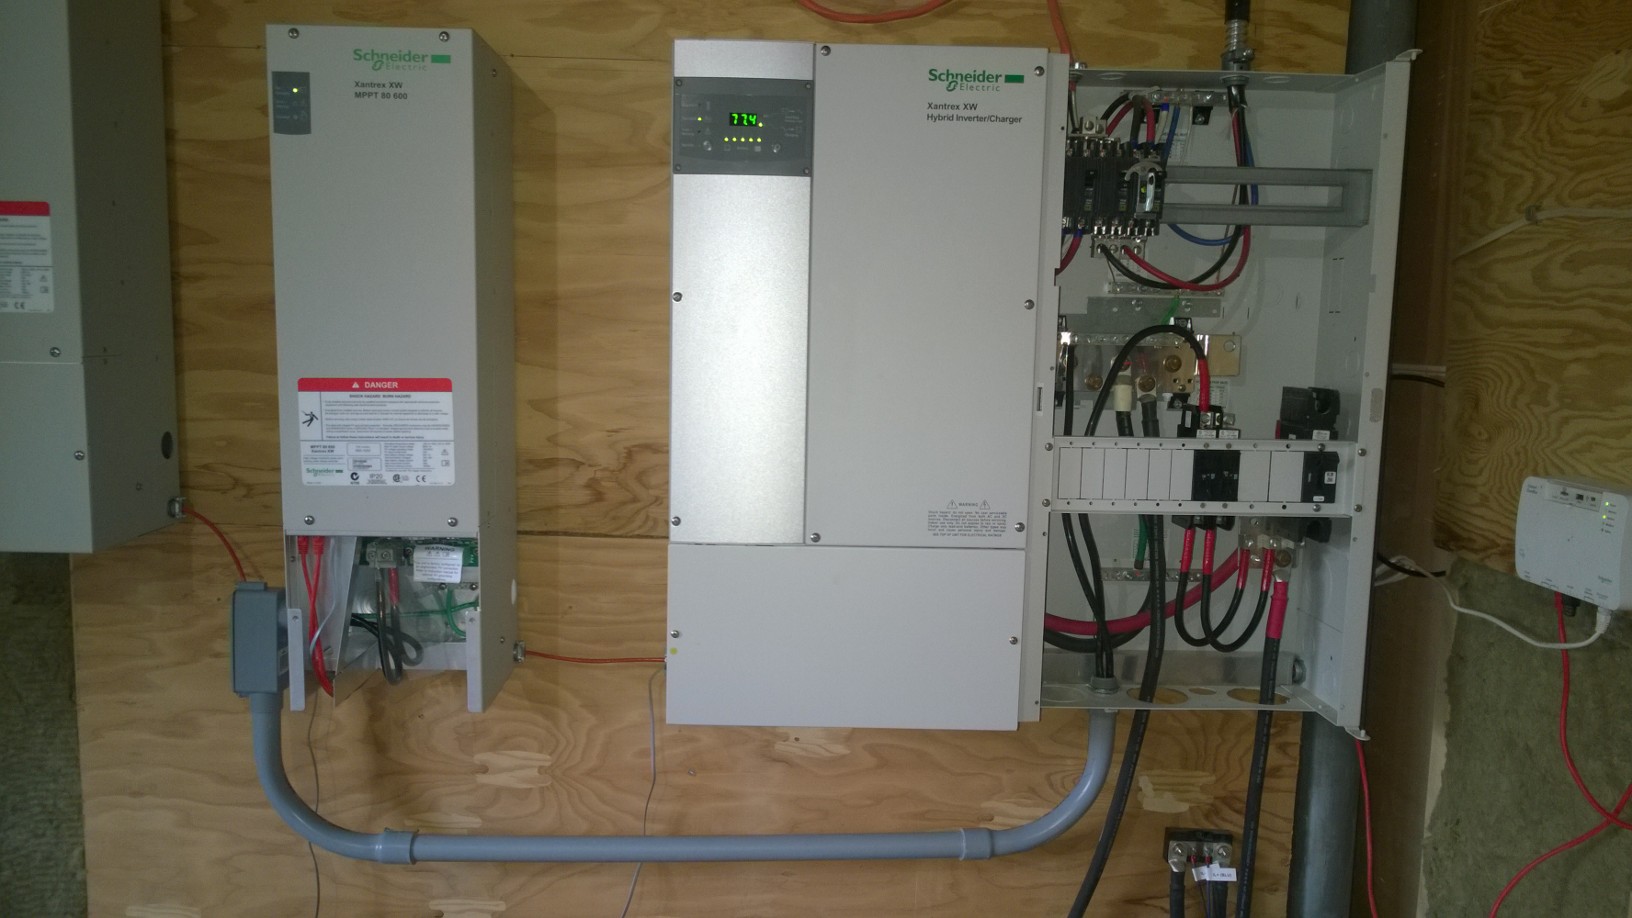
While I haven’t posted too much lately, we have actually been fairly busy with a number of things. As a continuation of work on the solar array, I managed to get one of the charge controllers connected into our system, all that is left on that front is to run the conduit and wiring back from the array to the house.
First charge controller wired into distribution panel
I also wanted to post a better picture of all the accessories that go along with the solar gear, so I’ve labeled them all in the following picture:
Solar gear
System Control Panel – This is a basic unit that shows you the status of the equipment and lets you program / configure all the various components (on the small LCD screen).
Combox – The combox connects all the solar gear to our ethernet network, and provides a nice web-based interface to configure all the equipment (in lieu of using the System Control Panel). It also has a bunch of logging, reporting, and email alerting capabilities.
Battery Monitor – This battery monitor is relatively advanced with the capability of measuring precisely how much energy is going in to, or out of, the battery bank. It is also capable of mid-point battery bank monitoring to detect imbalances between batteries, giving a better view into the health of the batteries.
Automatic Generator Starter – I still have to connect this little guy, but when I get it wired up it will be capable of automatically starting the generator as needed, and can be programmed to do so under a wide range of system conditions, such as low battery voltage, or high power draw by loads in the house. I hope to get this wired up in the next couple months! Of course, I will still have to check and make sure the generator always has enough gas!
We have also been continuing work on the siding, when the weather is agreeable. We got the entire back side done and have started putting up the gable trim, window & door trim, and the battens on that side.
Back side of house siding progress
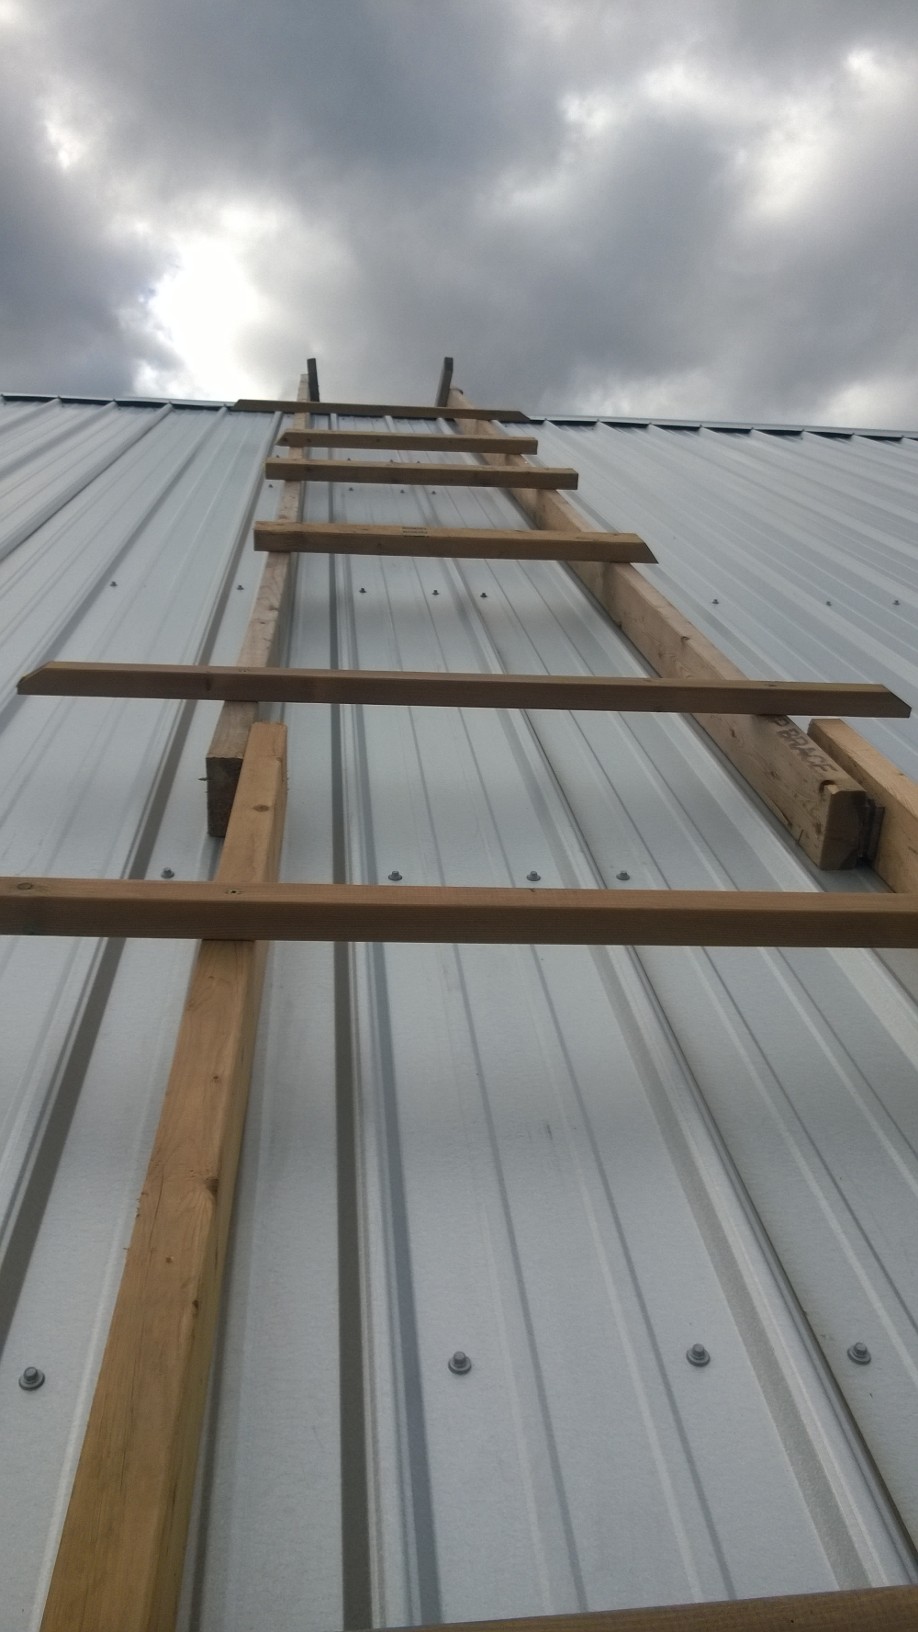
Finally, in an effort to finish off the roof in a safe manner, I built a sort of rudimentary ladder that hooks over the ridge of the roof, providing a safe way to scale one side of the roof and drive in the remaining fasteners. I will have to flip it around to the front side of the house once I get all the fasteners driven into the back side.
“Ladder” for safely scaling roof
Anyway, the weather is expected to turn and we may even get some snow this weekend, so I’ll have to leave it there and post more updates later!
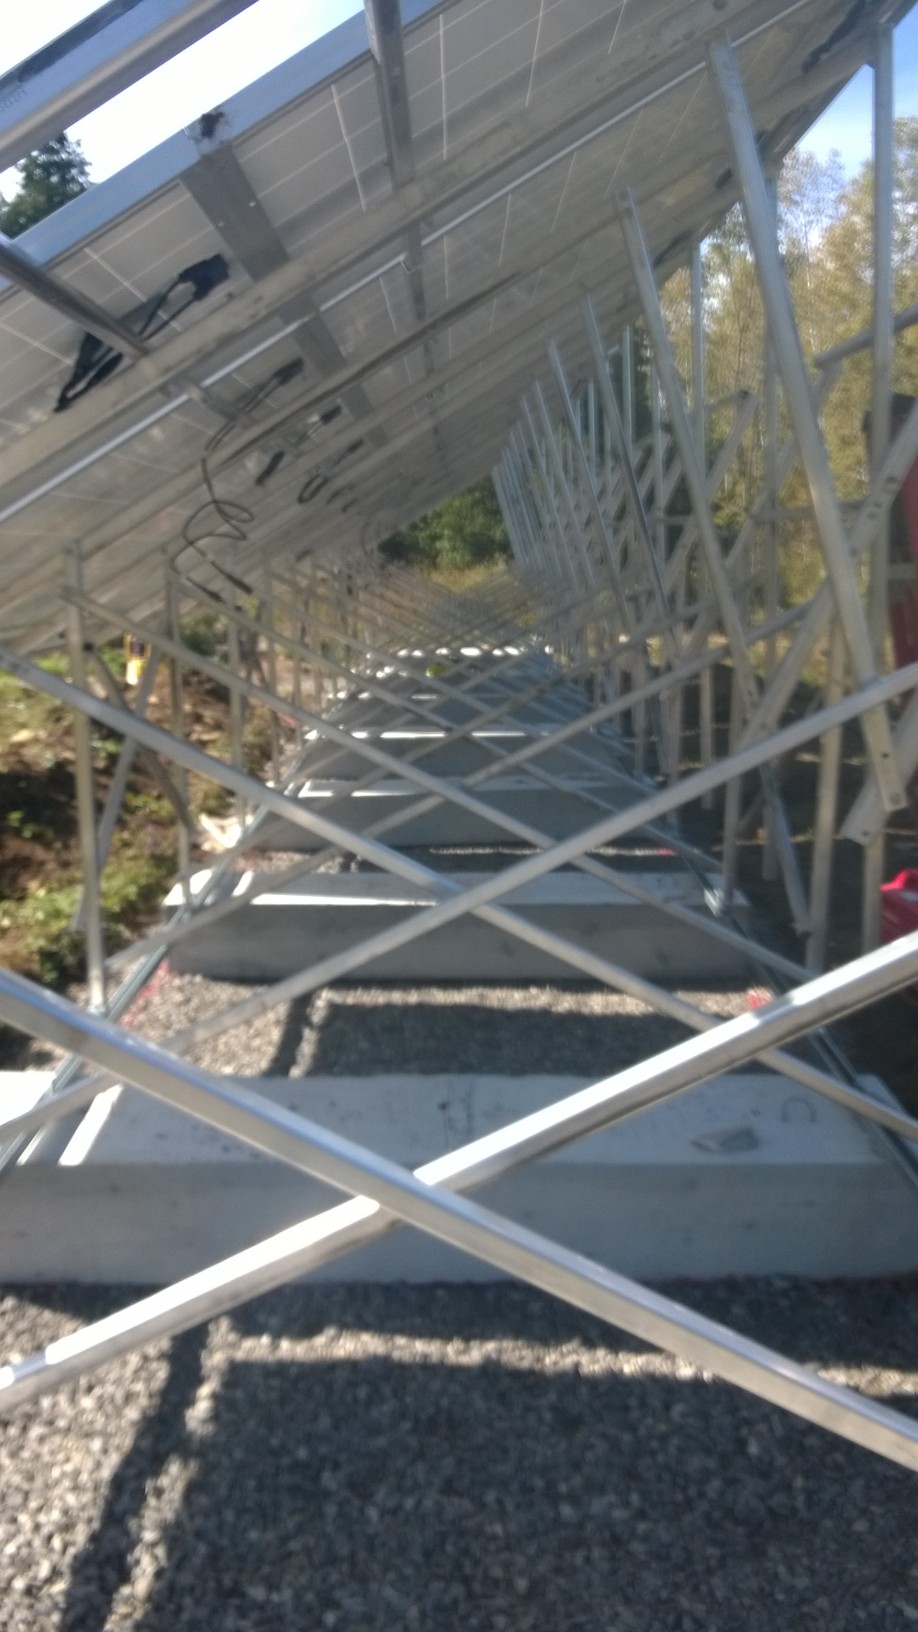
This morning we took an hour or so to go out and install the final ten solar panels on the racks.
Solar panels all installed!
As I may have mentioned before, our array consists of twenty-six 250W panels with a total capacity of 6,500W. We will be configuring the array as two strings of 13 panels, each string will go into it’s own 80A MPPT charge controller.
6500W Solar Array
The racking is designed and manufactured right here in Ontario by a company called FabRack Solar. The racks are manually adjustable to optimize solar collection for different times of the year, and are really well designed.
FabRack solar racks
All we have to do now is figure out the wiring and get it all connected and we’ll be good to go!
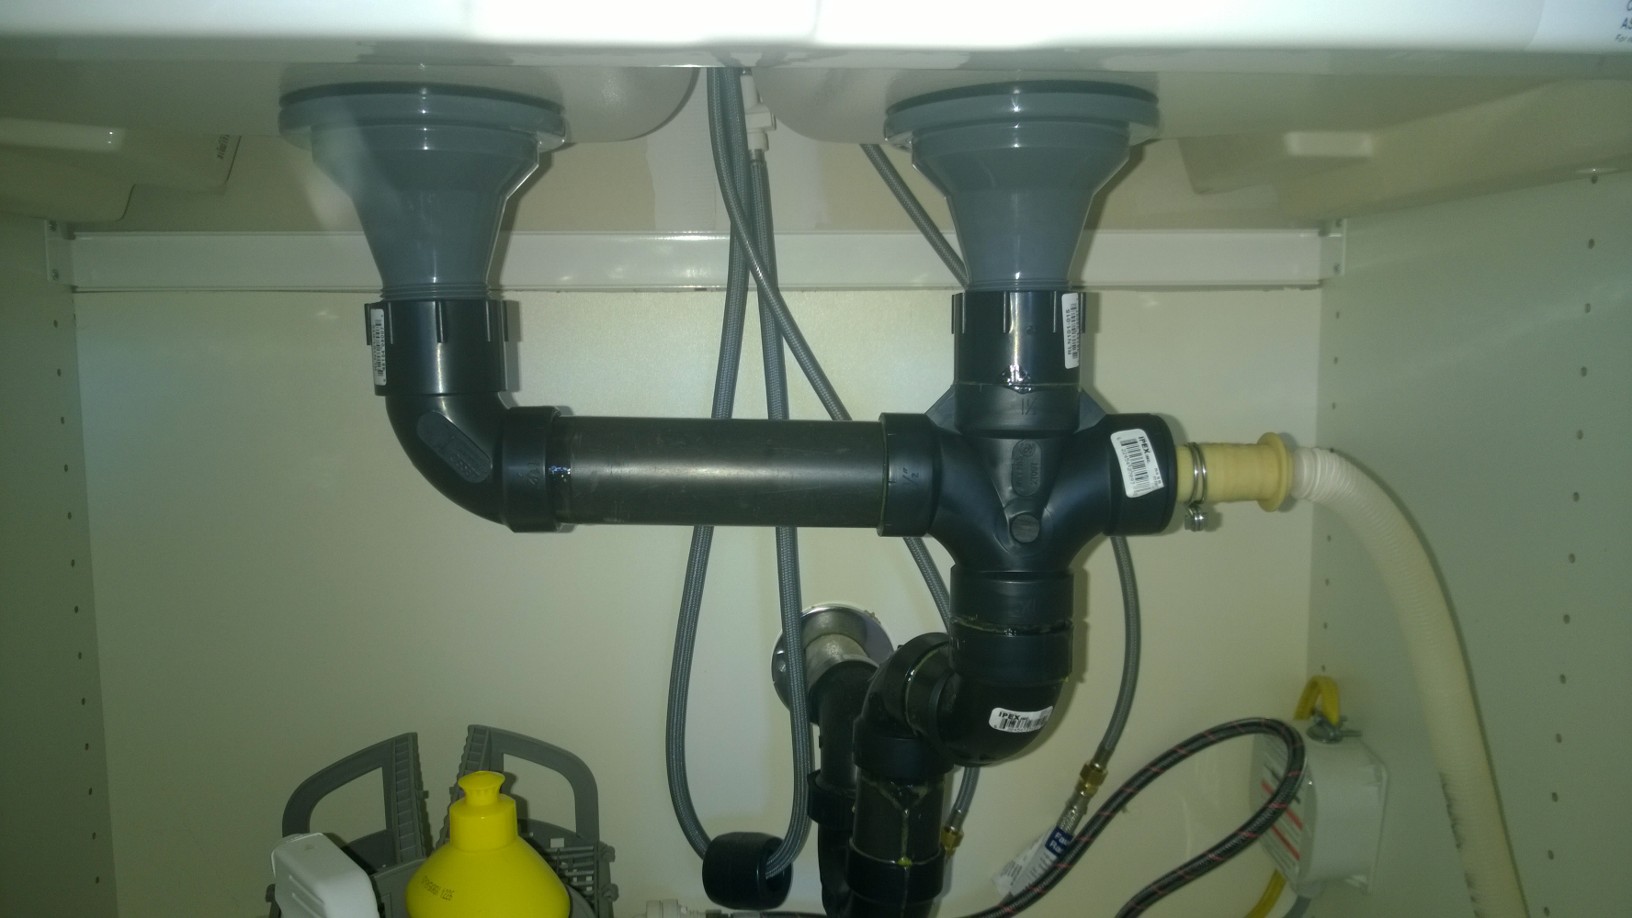
Yesterday it was still pretty cold and miserable outside, so we decided to finish off the kitchen sink to get that squared away. The sink comes with a couple of threaded fittings for the drains, so I purchased some ABS fittings to connect to those, and a couple other miscellaneous fittings, and got to work.
The important thing when working on something like this is to dry fit and prepare everything in advance so you can see how it will all go together. The ABS cement sets quickly so you don’t have a lot of time to fiddle around, and you have to connect some fittings in order so you don’t get yourself into a position where you need to thread something onto a drain and find that you can’t because everything else you connected prevents that!
Kitchen sink drain complete!
I also had to cut out the dishwasher drain we previously connected, and reconnect that to the new drain system. All is working well, so we can cross another item off the list!
It looks to be a nice day out there today so we will try to get back out and install the remaining solar panels on the racking, and then start working out how to connect all the wiring so we can finally start collecting those sunbeams!
Hope you enjoyed the picture, stay tuned for more updates!