The other day I got a picture of our motley crew of animals (not pictured, our newest rabbit Chewie, who is segregated from the others until he gets settled in), and thought I would share it. You can see poor Fluffy’s head is quite tilted which is causing him some issues, but he is hanging in there and doesn’t appear to be in any pain.

On the house front, I have been continuing with the duct work for our HRV. While possible to use flexible duct, I opted to use rigid ducting as much as possible, as it provides better airflow than flexible duct. Sometimes connecting the ducting together involves using a set of crimping scissors, to add a crimped end to a duct where it was un-crimped originally, as follows:


I also brought up the main 6″ duct for the exhaust air through the main bathroom/laundry room – from here it branches off to 4″ ducting into the main bathroom. This 4″ branch is terminated with a “T” as we will connect a 4″ exhaust vent both in the main bath, and to the master bath which is on the other side of the wall you see on the right:

You can also see that the ducting stack at the back is reduced from 6″ to 4″, then goes through the vapour barrier and into the attic at the back there. In the attic, I will use 4″ insulated duct to get a run over to the kitchen, as you are also required by code to have an exhaust register in the kitchen, separate from the range vent hood.
As you are also required to have a fresh air supply to the basement, living room, and bedrooms, I started cutting in the hole for the vent in the living room floor. As we are using a 4″ duct for fresh air, we chose a 3″x10″ rectangular register for the job. First step is to select a spot which is free from obstructions in the basement (make sure we are clear of any floor joists and gas piping), and at least 3″ from the wall. You start out measuring and marking, then you drill holes in each of the 4 corners:
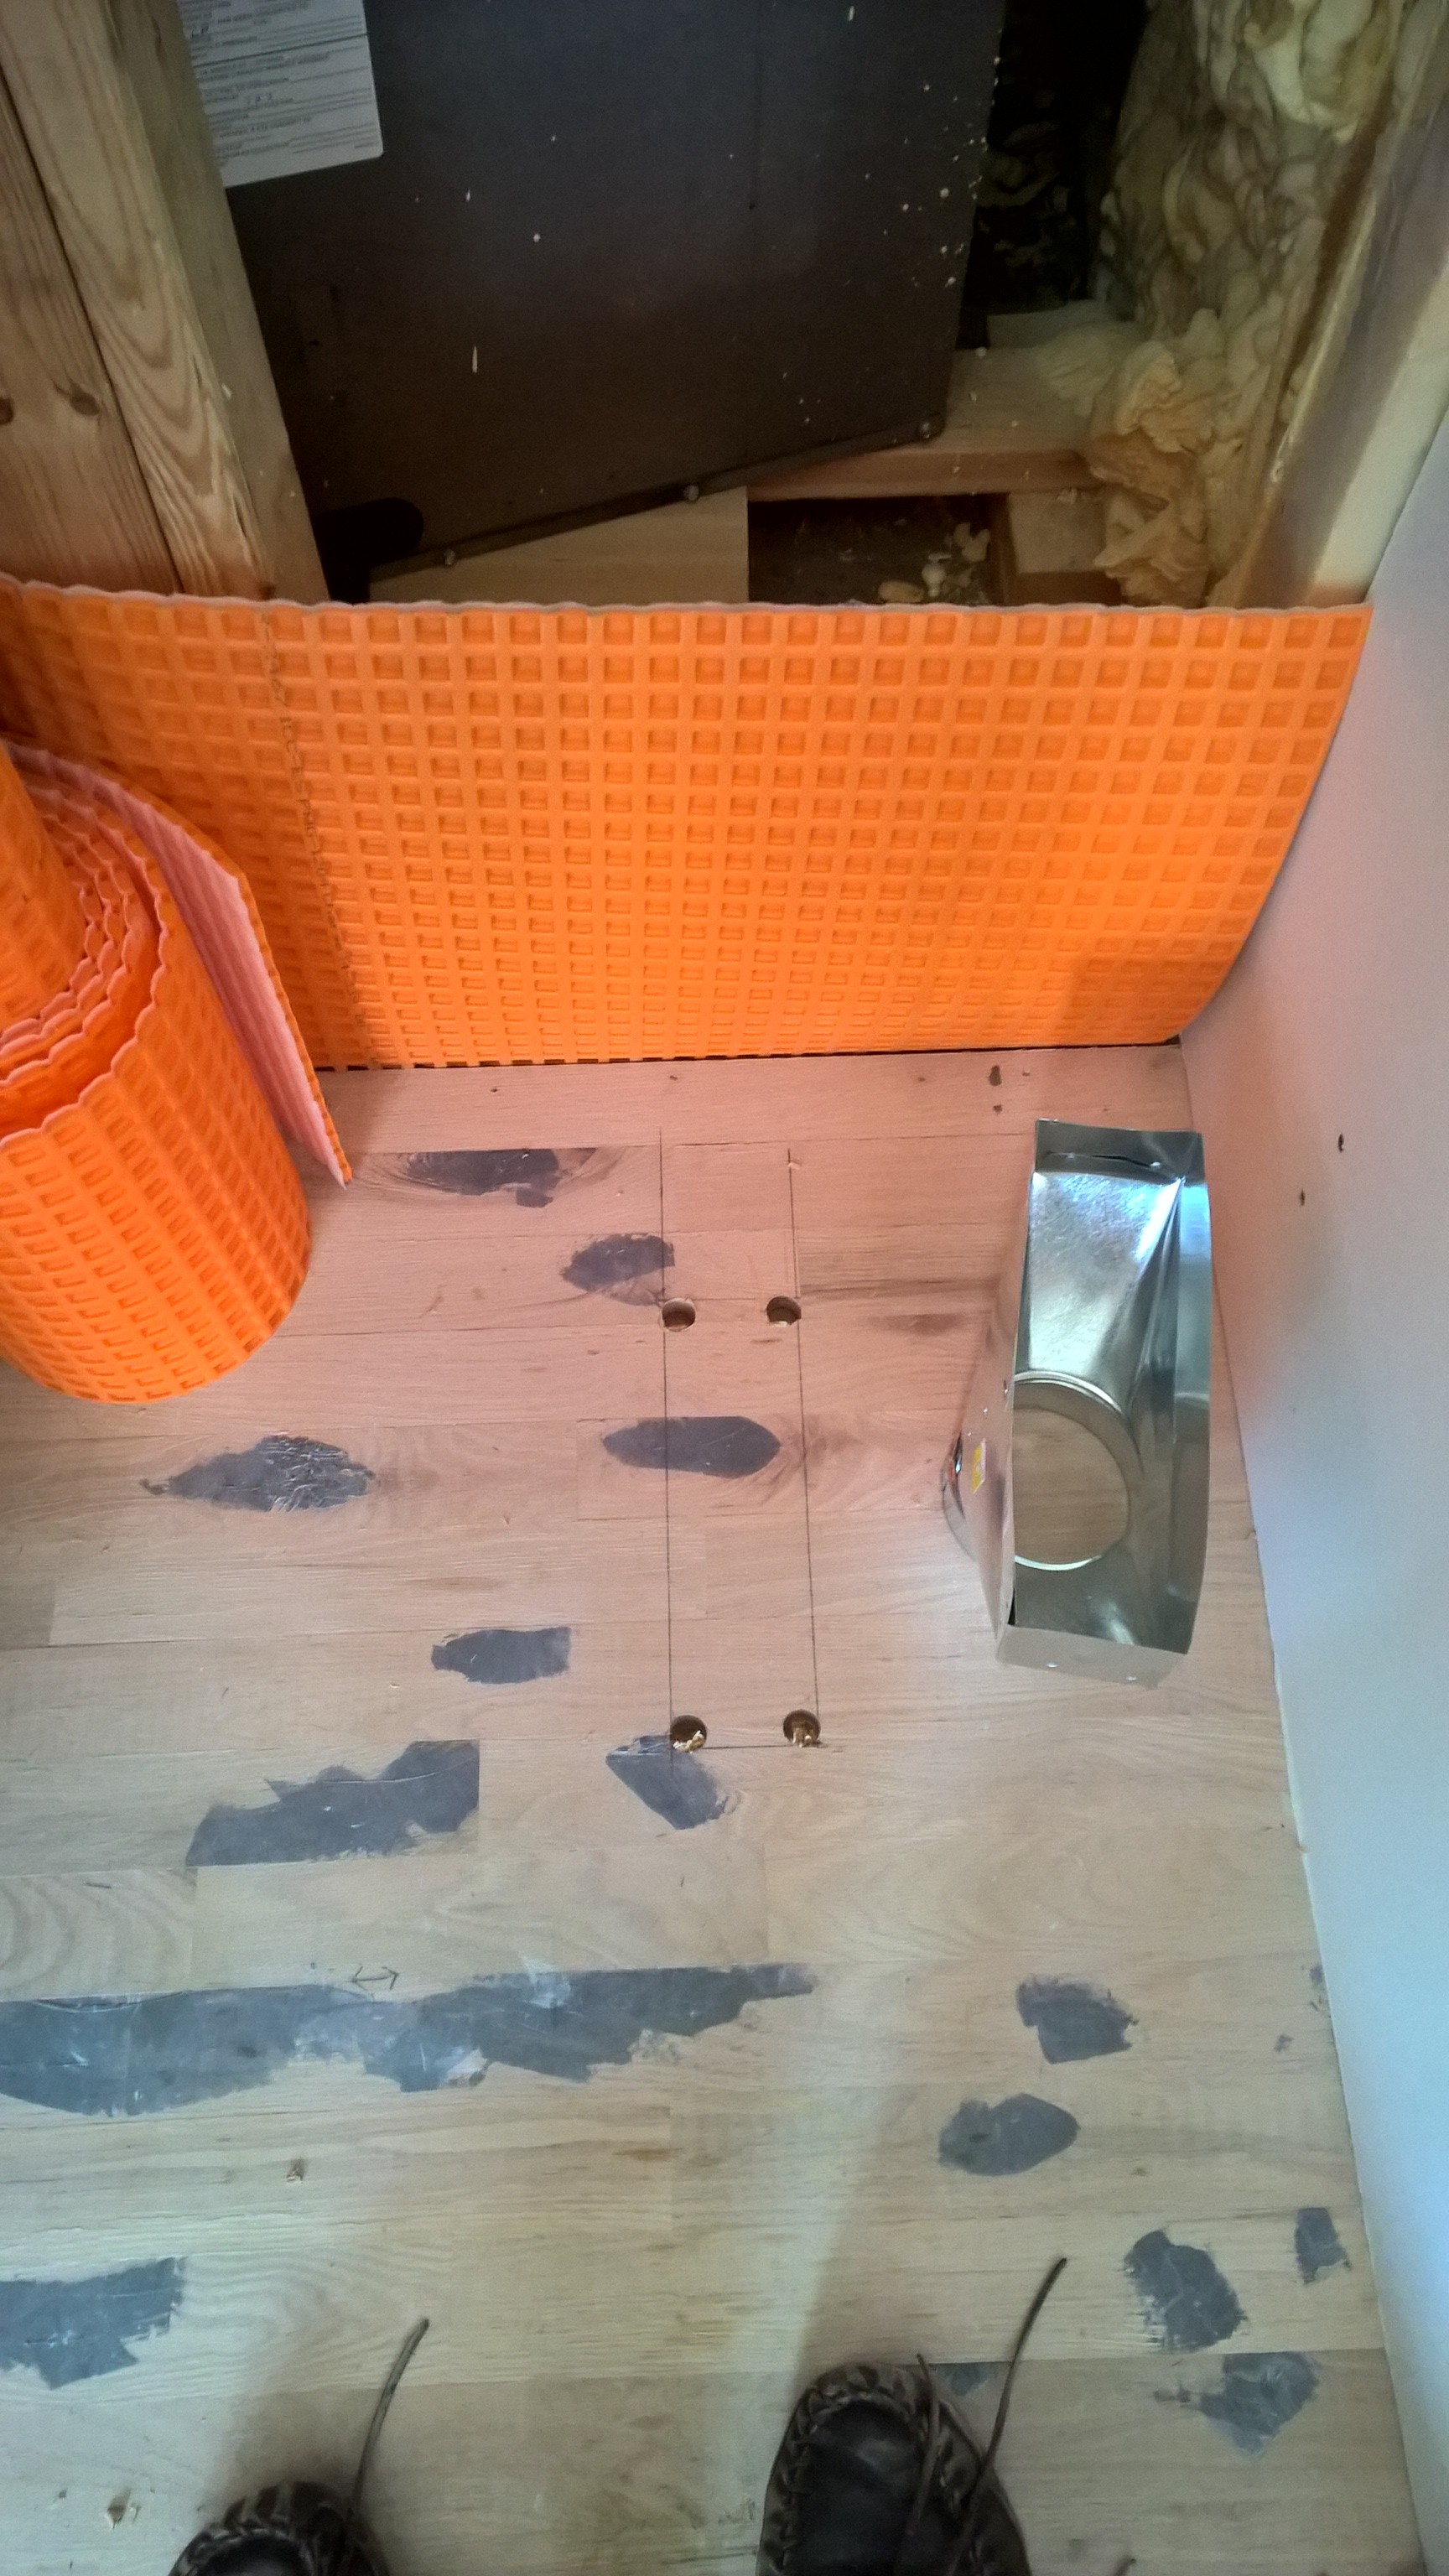
From there, time to crack out the jigsaw and cut along the lines, connecting the holes. You might have to do a little finish work in the corners to get them nice and square.

Before I actually go down in the basement and connect the ducting boot you see in the picture there to the floor from below, I’ll pop out and pick up a couple of floor registers, and test fit them, just to make sure we won’t have any fit issues.
I also got around to wiring up the controls for the HRV itself. While not difficult, it was just some more wiring to be run. In the kitchen/living area we have a digital control that sets the overall state of the HRV (high/low/etc) for the house overall.
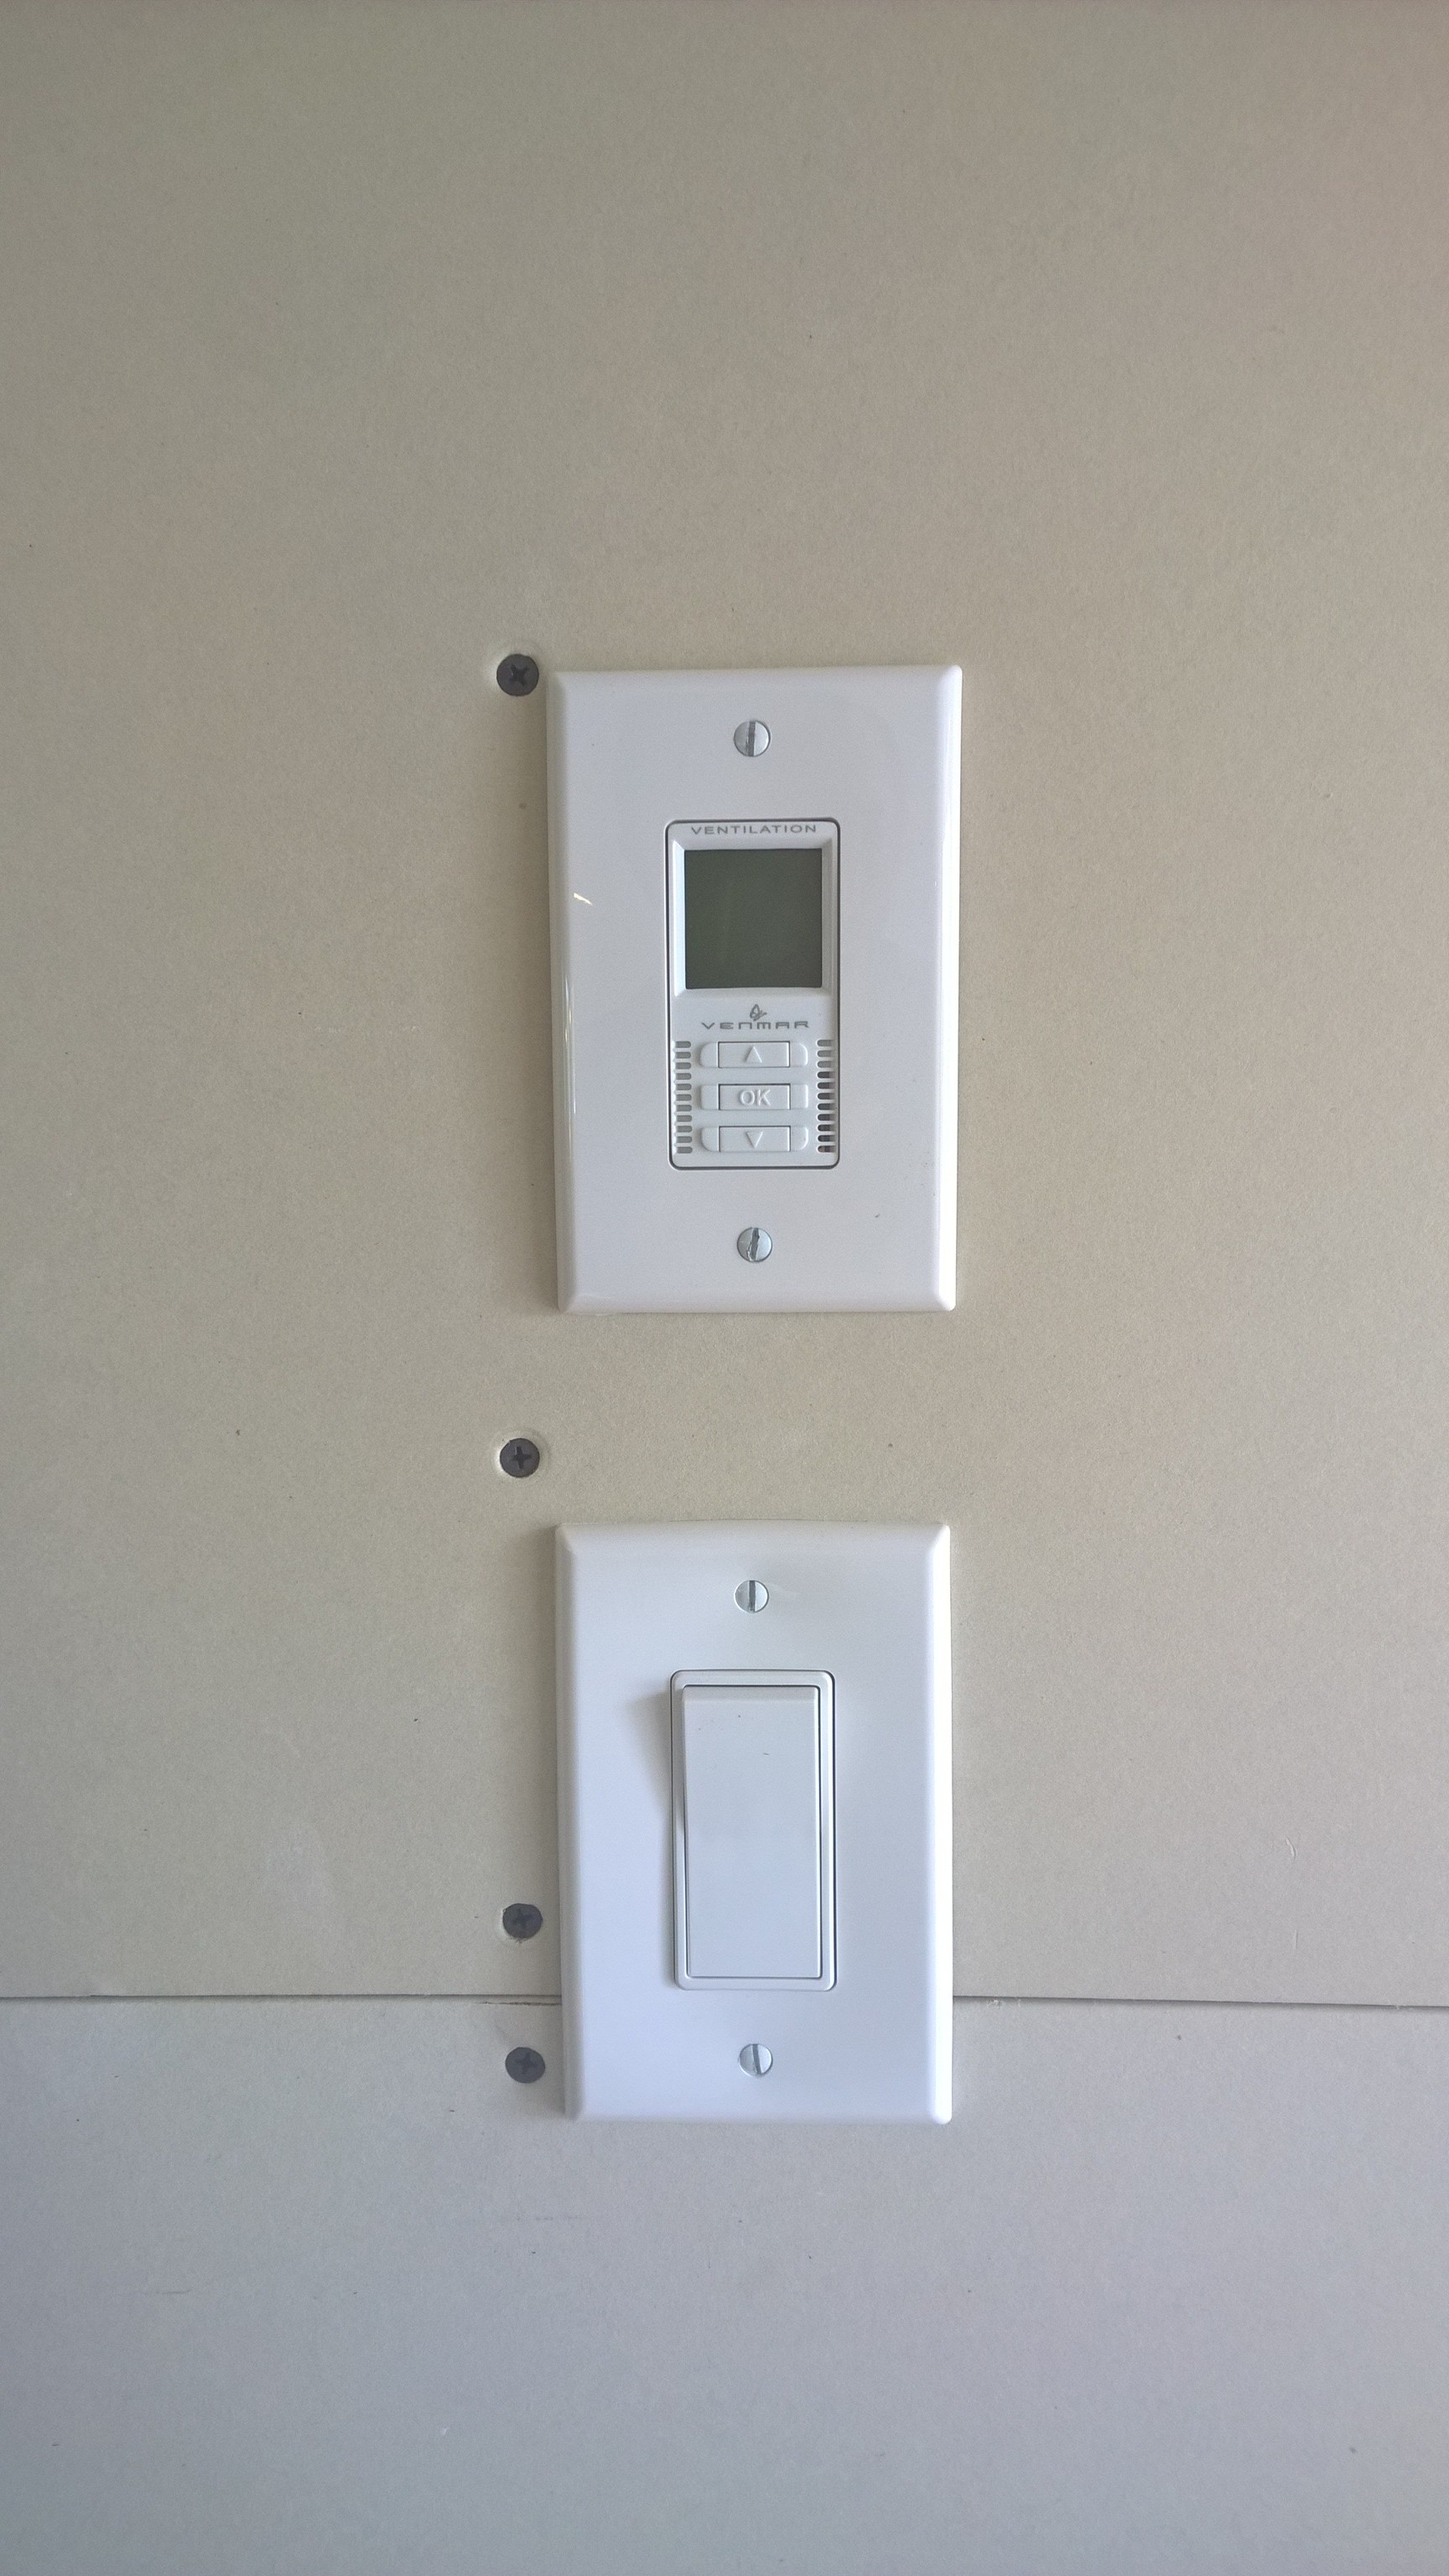
in each of the bathrooms we have installed a 20/40/60 minute timer that will override the main control and switch the HRV to high when they are used.

On another front, I have been pushing forward trying to get all our electrical outlets installed, as well as installing proper light fixtures (just cheapo IKEA ones to get started). I also had to install the last two smoke detectors.

By code, we are required to have a smoke detector in the bedroom, the kitchen, and the basement. We opted for Kidde combination smoke / carbon monoxide detectors, as we have the generator and gas appliances, so better to the safe than sorry. It’s not like the old days either, the smoke detectors all have to be wired off of the kitchen light power (the most likely lighting you will notice is off in a power outage), and all need to be interconnected so that if one goes off, they all go off! Quite a racket when you first turn them on and test them. They also have a battery backup, but that will likely never get used as we are at no risk of losing power in a storm. One of the pluses of generating your own power I guess 🙂
Now that the washer and dryer are in the laundry room and out of the way, I was able to bring up and install the last kitchen cabinet and get it installed. I also took the opportunity to put on the drawer hardware, but did leave the protective blue film in place for now, and it’ll probably stay on until after mostly all construction is complete.

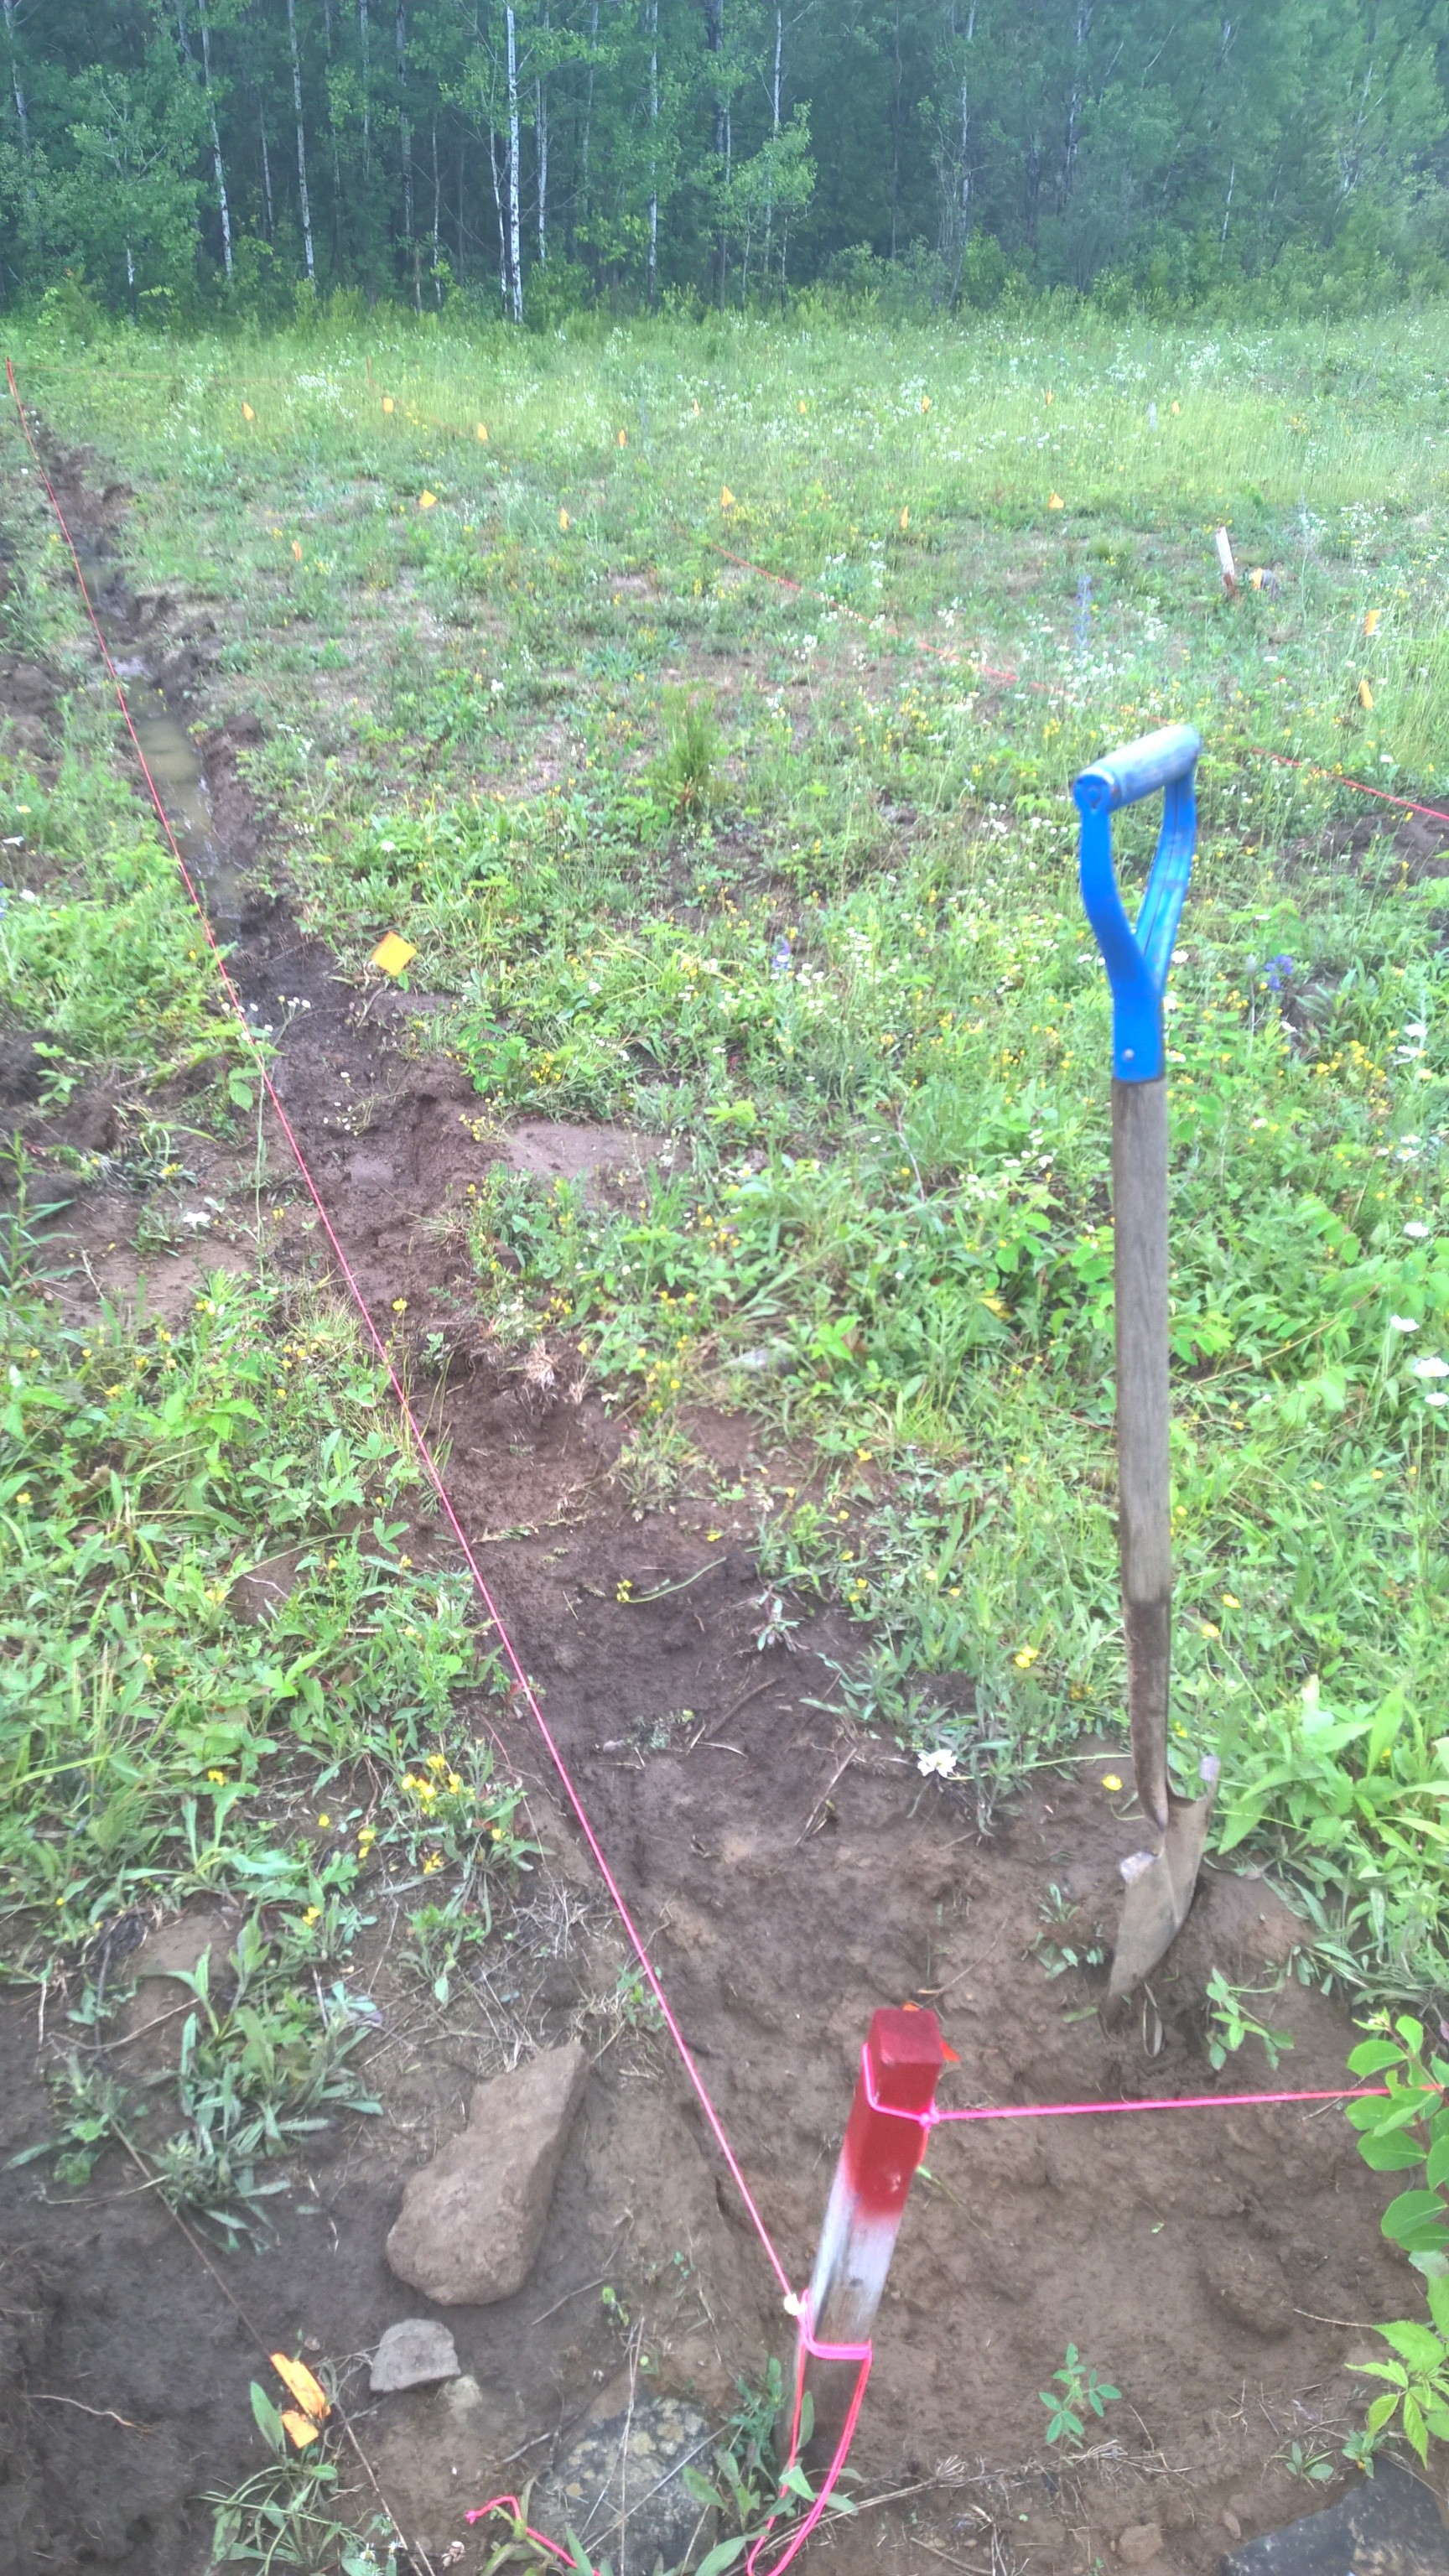
Finally, last weekend we had a lovely day, so I went out to the meadow behind the house and staked out the area where our solar panels will go. I need to remove all the topsoil from the area, then get a truckload of gravel brought in to create a level and well draining pad for the racking to sit on, so I spent a bit of quality time with my spade and moved a little dirt. A few more days at it and I’ll be ready for the gravel!
I’ve got to head off to the hardware store now to purchase some more supplies for the ducting, but hope you enjoyed the post and the pictures!
Really enjoyed all the pictures. Looking more and more like home. The pet picture is so cute! Looks like they all get along well. Thanks for sharing!